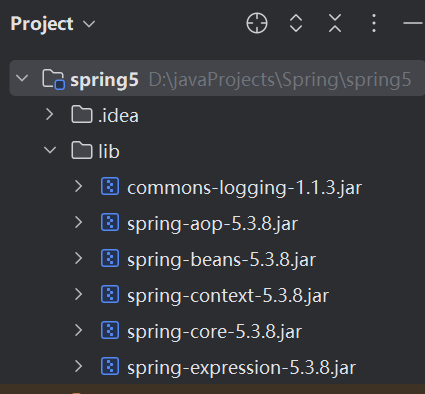
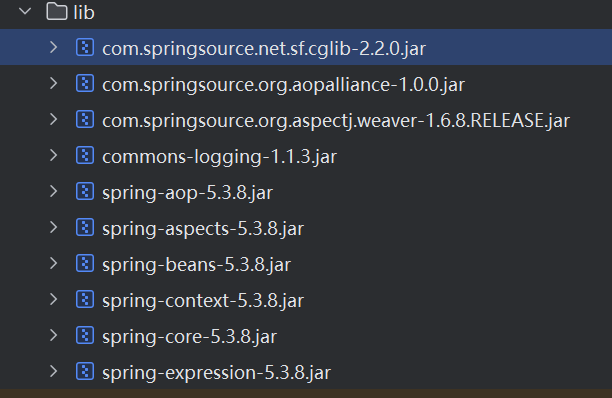
用的是jdk8,spring框架里jar包的下载可以自己搜到
注解用到的jar包。
60,注解配置Bean快速入门
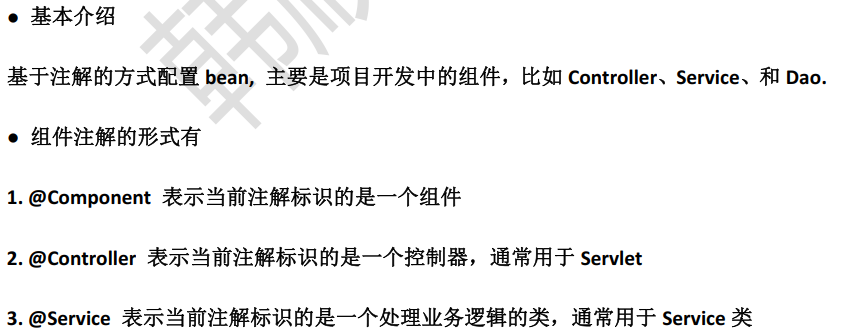
基本介绍
![]()
代码结构:
UserDao.java
package com.hspedu.spring.component;import org.springframework.stereotype.Repository;/*
* 使用 @Repository 标识该类是一个Repository,是一个持久层的类/对象
*/
@Repository
public class UserDao {
}
UserService.java
package com.hspedu.spring.component;import org.springframework.stereotype.Service;/** 使用 @Service 标识该类是一个Service类/对象*/
@Service
public class UserService {
}
UserAction.java
package com.hspedu.spring.component;import org.springframework.stereotype.Controller;/** 使用 @Controller 标识该类是一个控制器Controller,通常这个类是一个Servlet*/
@Controller
public class UserAction {
}
MyComponent.java
package com.hspedu.spring.component;import org.springframework.stereotype.Component;/** 使用 @Component 标识该类是一个组件,是一个通用的注解*/
@Component
public class MyComponent {
}
beans.xml
<?xml version="1.0" encoding="UTF-8"?>
<beans xmlns="http://www.springframework.org/schema/beans"xmlns:xsi="http://www.w3.org/2001/XMLSchema-instance" xmlns:util="http://www.springframework.org/schema/util"xmlns:context="http://www.springframework.org/schema/context"xsi:schemaLocation="http://www.springframework.org/schema/beans http://www.springframework.org/schema/beans/spring-beans.xsd http://www.springframework.org/schema/util https://www.springframework.org/schema/util/spring-util.xsd http://www.springframework.org/schema/context https://www.springframework.org/schema/context/spring-context.xsd"><!--配置容器要扫描的包老师解读1. component-scan 要对指定包下的类进行扫描, 并创建对象到容器2. base-package 指定要扫描的包3. 含义是当spring容器创建/初始化时,就会扫描com.hspedu.spring.component包下的所有的 有注解 @Controller / @Service / @Respository / @Component类将其实例化,生成对象,放入到ioc容器4. resource-pattern="User*.class" 表示只扫描com.hspedu.spring.component 和它的子包下的User打头的类--><context:component-scan base-package="com.hspedu.spring.component" />
</beans>
SpringBeanTest.java
package com.hspedu.spring.test;import com.hspedu.spring.bean.*;
import com.hspedu.spring.component.MyComponent;
import com.hspedu.spring.component.UserAction;
import com.hspedu.spring.component.UserDao;
import com.hspedu.spring.component.UserService;
import com.hspedu.spring.factory.MyStaticFactory;
import com.hspedu.spring.service.MemberServiceImpl;
import com.hspedu.spring.web.OrderAction;
import org.junit.Test;
import org.springframework.context.ApplicationContext;
import org.springframework.context.ConfigurableApplicationContext;
import org.springframework.context.support.ClassPathXmlApplicationContext;import java.awt.print.Book;public class SpringBeanTest {//通过注解来配置Bean
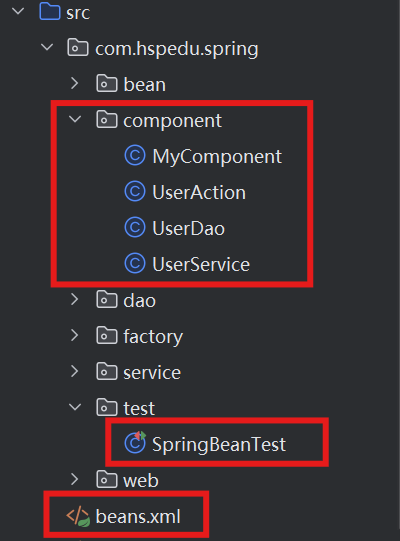
@Testpublic void setBeanByAnnotation() {ApplicationContext ioc =new ClassPathXmlApplicationContext("beans.xml");UserDao userDao = ioc.getBean(UserDao.class);UserService userService = ioc.getBean(UserService.class);UserAction userAction = ioc.getBean(UserAction.class);MyComponent myComponent = ioc.getBean(MyComponent.class);System.out.println("userDao=" + userDao);System.out.println("userService=" + userService);System.out.println("userAction=" + userAction);System.out.println("myComponent=" + myComponent);System.out.println("ok");}
}
运行结果:
63,注意事项和细节
4,resource-pattern="User*.class" 表示只扫描com.hspedu.spring.component 和它的子包下的User打头的类,,这个和第3点自己记住就行。

还有其他3个注意事项都放在代码里了,就是 排除哪些注解 ,指定扫描哪些注解,标记注解后,可以使用什么来指定id值。
代码结构不变,beans.xml,UserDao.java,SpringBeanTest.java
beans.xml
<?xml version="1.0" encoding="UTF-8"?>
<beans xmlns="http://www.springframework.org/schema/beans"xmlns:xsi="http://www.w3.org/2001/XMLSchema-instance" xmlns:util="http://www.springframework.org/schema/util"xmlns:context="http://www.springframework.org/schema/context"xmlns:contect="http://www.springframework.org/schema/c"xsi:schemaLocation="http://www.springframework.org/schema/beans http://www.springframework.org/schema/beans/spring-beans.xsd http://www.springframework.org/schema/util https://www.springframework.org/schema/util/spring-util.xsd http://www.springframework.org/schema/context https://www.springframework.org/schema/context/spring-context.xsd"><!--配置容器要扫描的包老师解读1. component-scan 要对指定包下的类进行扫描, 并创建对象到容器2. base-package 指定要扫描的包3. 含义是当spring容器创建/初始化时,就会扫描com.hspedu.spring.component包下的所有的 有注解 @Controller / @Service / @Respository / @Component类将其实例化,生成对象,放入到ioc容器4. resource-pattern="User*.class" 表示只扫描com.hspedu.spring.component 和它的子包下的User打头的类-->
<!--    <context:component-scan base-package="com.hspedu.spring.component"/>--><!--需求:如果我们希望排除某个包/子包下的某种类型的注解,可以通过exclude-filter来指定1. context:exclude-filter 指定要排除哪些类2. type 指定排除方式 annotation表示按照注解来排除3. expression="org.springframework.stereotype.Service" 指定要排除的注解的全路径-->
<!--    <context:component-scan base-package="com.hspedu.spring.component">-->
<!--        <context:exclude-filter type="annotation" expression="org.springframework.stereotype.Service"/>-->
<!--    </context:component-scan>--><!--需求:如果我们希望按照自己的规则,来扫描包/子包下的某些注解, 可以通过 include-filter1. use-default-filters="false" 表示不使用默认的过滤机制/扫描机制2. context:include-filter 表示要去扫描哪些类3. type="annotation" 按照注解方式来扫描/过滤4. expression="org.springframework.stereotype.Service" 指定要扫描的注解的全路径--><context:component-scan base-package="com.hspedu.spring.component" use-default-filters="false"><context:include-filter type="annotation" expression="org.springframework.stereotype.Service"/><context:include-filter type="annotation" expression="org.springframework.stereotype.Repository"/></context:component-scan>
</beans>
UserDao.java
package com.hspedu.spring.component;import org.springframework.stereotype.Repository;/*
* 使用 @Repository 标识该类是一个Repository,是一个持久层的类/对象
* 1,标记注解后,类名首字母小写作为id的值(默认)
* 2,value = "hspUserDao" 使用指定的 hspUserDao 作为 UserDao对象的 id
*/
@Repository(value = "hspUserDao")
public class UserDao {
}
SpringBeanTest.java
package com.hspedu.spring.test;import com.hspedu.spring.bean.*;
import com.hspedu.spring.component.MyComponent;
import com.hspedu.spring.component.UserAction;
import com.hspedu.spring.component.UserDao;
import com.hspedu.spring.component.UserService;
import com.hspedu.spring.component.t.Pig;
import com.hspedu.spring.factory.MyStaticFactory;
import com.hspedu.spring.service.MemberServiceImpl;
import com.hspedu.spring.web.OrderAction;
import org.junit.Test;
import org.springframework.context.ApplicationContext;
import org.springframework.context.ConfigurableApplicationContext;
import org.springframework.context.support.ClassPathXmlApplicationContext;import java.awt.print.Book;public class SpringBeanTest {//通过注解来配置Bean
    @Testpublic void setBeanByAnnotation() {ApplicationContext ioc =new ClassPathXmlApplicationContext("beans.xml");UserDao userDao = ioc.getBean(UserDao.class);//默认情况:标记注解后,类名首字母小写作为 id 的值。也可以使用注解的 value 属性指定 id 值,并且 value 可以省略。System.out.println("userDao=" + userDao);UserService userService = ioc.getBean(UserService.class);UserAction userAction = ioc.getBean(UserAction.class);MyComponent myComponent = ioc.getBean(MyComponent.class);System.out.println("userService=" + userService);System.out.println("userAction=" + userAction);System.out.println("myComponent=" + myComponent);System.out.println("ok");}
}
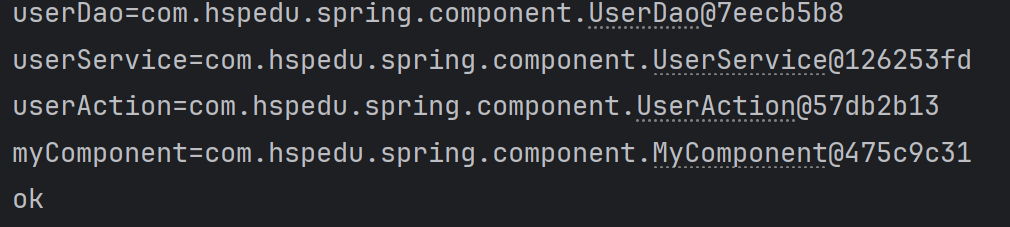
Debug结果:
通过下断点,然后Debug来测试最后一个注意事项。 点 ioc -- beanFactory -- singletonObjects 就能看到
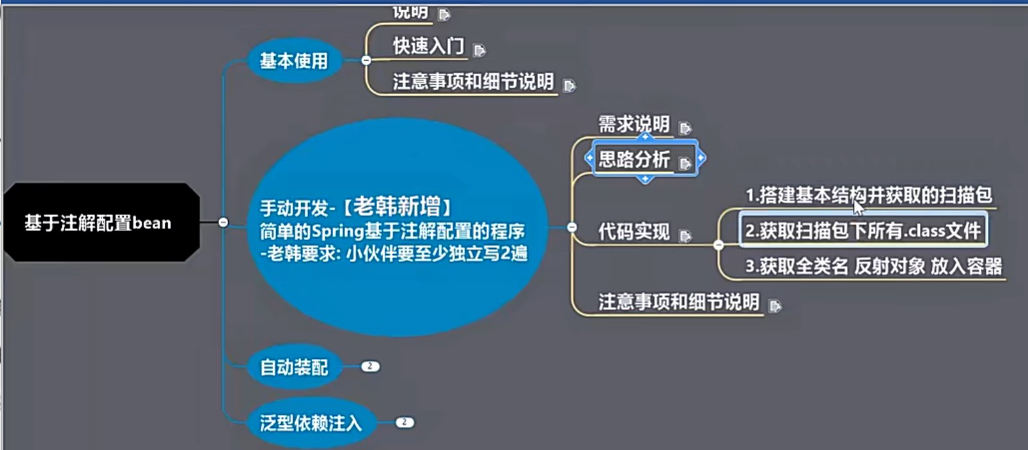
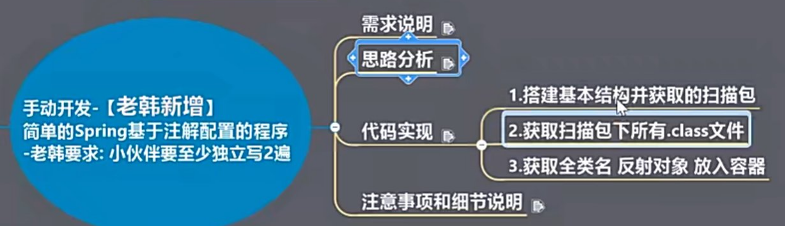
68,自己实现Spring注解配置Bean机制


思路分析:

代码结构:
其中 component 包里的4个java文件都是 上一篇笔记的代码,没有改变。
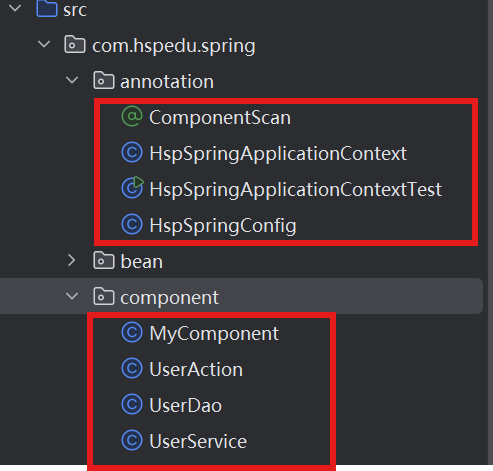
ComponentScan.java
package com.hspedu.spring.annotation;import java.lang.annotation.ElementType;
import java.lang.annotation.Retention;
import java.lang.annotation.RetentionPolicy;
import java.lang.annotation.Target;/*** @Target 用于修饰 Annotation定义,用于指定被修饰的 Annotation 能用于修饰哪些程序元素* @Retention 只能用于修饰一个 Annotation定义,用于指定该 Annotation可以保留多长时间* 1. @Target(ElementType.TYPE)指定我们的ComponentScan注解可以修饰 Type程序元素* 2. @Retention(RetentionPolicy.RUNTIME) 指定ComponentScan注解 保留范围:表示:编译器将把注解记录在class文件中,当运行Java程序时,通过反射获取该注解* 3. String value() default ""; 表示ComponentScan 可以传入 value
*/
@Target(ElementType.TYPE)
@Retention(RetentionPolicy.RUNTIME)
public @interface ComponentScan {String value() default "";
}
HspSpringConfig.java
package com.hspedu.spring.annotation;/*** 这是一个配置类, 作用类似我们原生spring的 beans.xml 容器配置文件*/
@ComponentScan(value = "com.hspedu.spring.component")
public class HspSpringConfig {
}
HspSpringApplicationContext.java
package com.hspedu.spring.annotation;import org.springframework.stereotype.Component;
import org.springframework.stereotype.Controller;
import org.springframework.stereotype.Repository;
import org.springframework.stereotype.Service;
import org.springframework.util.StringUtils;import java.io.File;
import java.lang.annotation.Annotation;
import java.net.URL;
import java.util.concurrent.ConcurrentHashMap;/*** HspSpringApplicationContext 类的作用类似Spring原生ioc容器*/public class HspSpringApplicationContext {private Class configClass;//ioc我存放的就是通过反射创建的对象(基于注解方式)private final ConcurrentHashMap<String, Object> ioc =new ConcurrentHashMap<>();//构造器public HspSpringApplicationContext(Class configClass) throws ClassNotFoundException, InstantiationException, IllegalAccessException {this.configClass = configClass;//System.out.println("this.configClass=" + this.configClass);//获取要扫描的包//1. 先得到HspSpringConfig配置的@ComponentScan(value = "com.hspedu.spring.component")ComponentScan componentScan =(ComponentScan)this.configClass.getDeclaredAnnotation(ComponentScan.class);//2. 通过componentScan的value=> 即要扫描的包String path = componentScan.value();System.out.println("要扫描的包= " + path);//得到要扫描的包下的所有资源(类 .class)//1.得到类的加载器ClassLoader classLoader =HspSpringApplicationContext.class.getClassLoader();//2. 通过类的加载器获取到要扫描的包的资源 url=》类似一个路径//一定要把. 替换成 /path = path.replace(".","/");URL resource =classLoader.getResource("com/hspedu/spring/component");System.out.println("resource=" + resource);//3. 将要加载的资源(.class) 路径下的文件进行遍历=>ioFile file = new File(resource.getFile());if (file.isDirectory()) {File[] files = file.listFiles();for (File f : files) {System.out.println("=============");System.out.println("=" + f.getAbsolutePath());//D:\javaProjects\Spring\spring5\out\production\spring5\com\hspedu\spring\component\UserService.class//获取到 com.hspedu.spring.component.UserServiceString fileAbsolutePath = f.getAbsolutePath();//这里我们只处理.class文件if (fileAbsolutePath.endsWith(".class")) {//1. 获取到类名String className =fileAbsolutePath.substring(fileAbsolutePath.lastIndexOf("\\") + 1, fileAbsolutePath.indexOf(".class"));//System.out.println("className=" + className);//2. 获取类的完整的路径(全类名)//老师解读 path.replace("/",".") => com.hspedu.spring.component.String classFullName = path.replace("/", ".") + "." + className;System.out.println("classFullName=" + classFullName);//3. 判断该类是不是需要注入容器, 就看该类是不是有注解 @Component @Service..//这时,我们就得到老该类的Class对象//Class clazz = Class.forName(classFullName)//老师说一下//1. Class clazz = Class.forName(classFullName) 可以反射加载类//2. classLoader.loadClass(classFullName); 可以反射类的Class//3. 区别是 : 上面方式后调用来类的静态方法, 下面方法不会Class<?> aClass = classLoader.loadClass(classFullName);//4. aClass.isAnnotationPresent(Component.class) 判断该类是否有 @Componentif (aClass.isAnnotationPresent(Component.class) ||aClass.isAnnotationPresent(Controller.class) ||aClass.isAnnotationPresent(Service.class) ||aClass.isAnnotationPresent(Repository.class)) {//这里老师演示一个Component注解指定value,分配id//老师就是演示了一下机制.//这时就可以反射对象,并放入到容器中Class<?> clazz = Class.forName(classFullName);Object instance = clazz.newInstance();//放入到容器中, 将类名的首字母小写作为id//StringUtils
                        ioc.put(StringUtils.uncapitalize(className) , instance);}}}}}//编写方法返回对容器中对象public Object getBean(String name) {return ioc.get(name);}
}
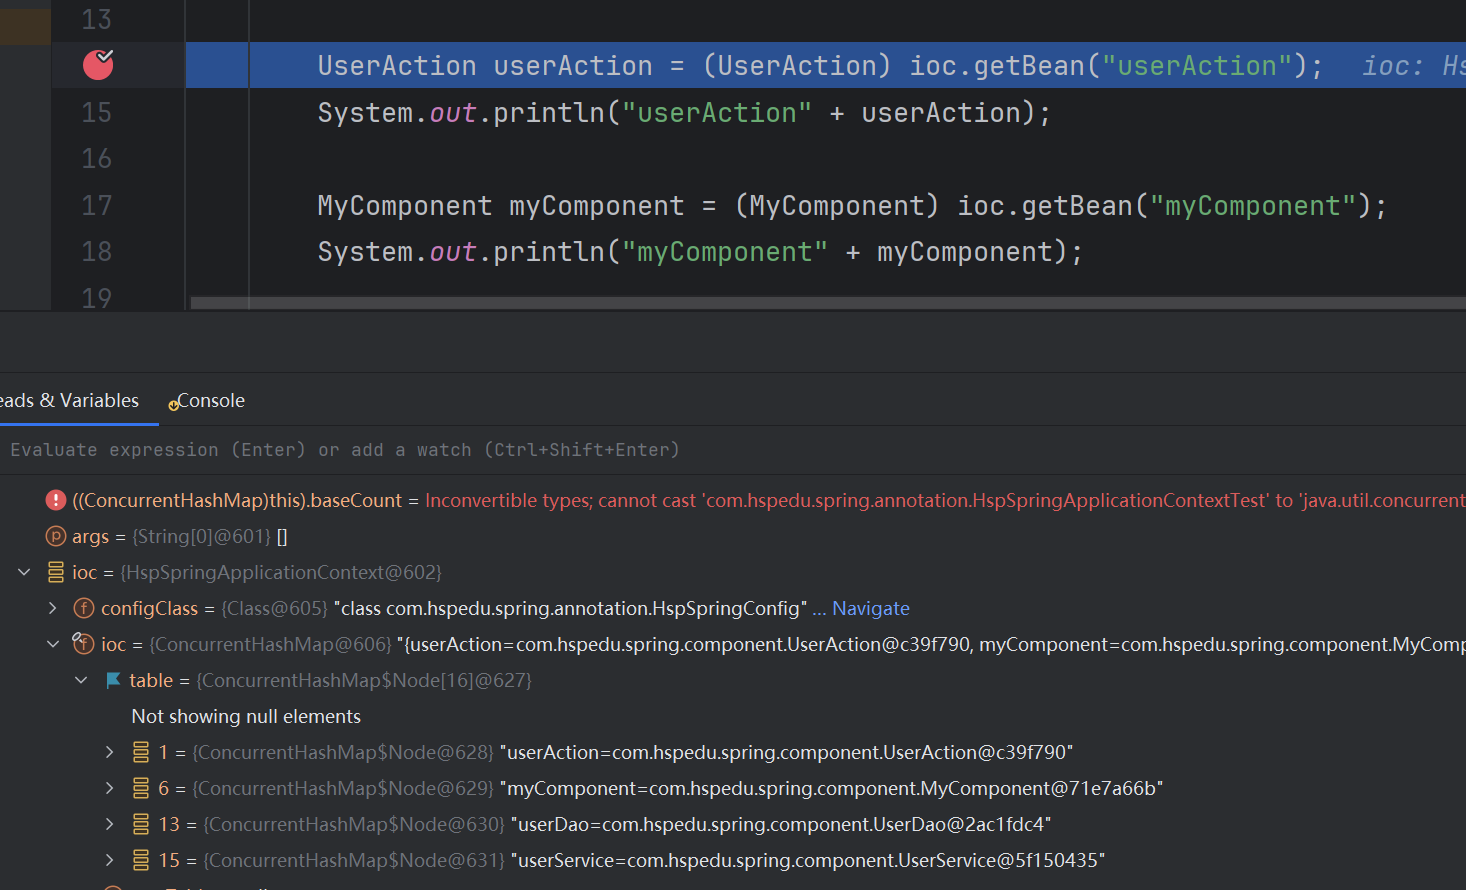
HspSpringApplicationContextTest.java
package com.hspedu.spring.annotation;import com.hspedu.spring.component.MyComponent;
import com.hspedu.spring.component.UserAction;
import com.hspedu.spring.component.UserDao;
import com.hspedu.spring.component.UserService;public class HspSpringApplicationContextTest {public static void main(String[] args) throws ClassNotFoundException, InstantiationException, IllegalAccessException {HspSpringApplicationContext ioc =new HspSpringApplicationContext(HspSpringConfig.class);UserAction userAction = (UserAction) ioc.getBean("userAction");System.out.println("userAction" + userAction);MyComponent myComponent = (MyComponent) ioc.getBean("myComponent");System.out.println("myComponent" + myComponent);UserService userService = (UserService) ioc.getBean("userService");System.out.println("userService=" + userService);UserDao userDao = (UserDao) ioc.getBean("userDao");System.out.println("userDao=" + userDao);System.out.println("ok");}
}
Debug结果:
运行结果:

76,自动装配@Autowired
代码结构:

UserService.java
package com.hspedu.spring.component;import org.springframework.stereotype.Service;/** 使用 @Service 标识该类是一个Service类/对象*/
@Service
public class UserService {public void hi() {System.out.println("UserService hi()~");}
}
UserAction.java
package com.hspedu.spring.component;import org.springframework.beans.factory.annotation.Autowired;
import org.springframework.stereotype.Controller;
import sun.java2d.pipe.SpanIterator;/** 使用 @Controller 标识该类是一个控制器Controller,通常这个类是一个Servlet*/
@Controller()
public class UserAction {//xml配置 ref//老师说明 @Autowired//1)在IOC容器中查找待装配的组件的类型,如果有唯一的bean匹配(按照类型),则使用该bean装配//2)如待装配的类型对应的bean在IOC容器中有多个,则使用待装配的属性的属性名作为id值再进行查找,//  找到就装配,找不到就抛异常
    @Autowired//private UserService userService;private UserService userService200;public void sayOk() {
//        System.out.println("UserAction.userService=" + userService);
//        System.out.println("userAction 装配的 userService属性=" + userService);System.out.println("userAction 装配的 userService200属性=" + userService200);//userService.hi();
    }
}
beans.xml
<?xml version="1.0" encoding="UTF-8"?>
<beans xmlns="http://www.springframework.org/schema/beans"xmlns:xsi="http://www.w3.org/2001/XMLSchema-instance" xmlns:util="http://www.springframework.org/schema/util"xmlns:context="http://www.springframework.org/schema/context"xmlns:contect="http://www.springframework.org/schema/c"xsi:schemaLocation="http://www.springframework.org/schema/beans http://www.springframework.org/schema/beans/spring-beans.xsd http://www.springframework.org/schema/util https://www.springframework.org/schema/util/spring-util.xsd http://www.springframework.org/schema/context https://www.springframework.org/schema/context/spring-context.xsd"><context:component-scanbase-package="com.hspedu.spring.component"/><!--配置两个UserService对象--><bean class="com.hspedu.spring.component.UserService" id="userService200"/><bean class="com.hspedu.spring.component.UserService" id="userService300"/>
</beans>
SpringBeanTest.java
package com.hspedu.spring.test;import com.hspedu.spring.bean.*;
import com.hspedu.spring.component.MyComponent;
import com.hspedu.spring.component.UserAction;
import com.hspedu.spring.component.UserDao;
import com.hspedu.spring.component.UserService;
import com.hspedu.spring.factory.MyStaticFactory;
import com.hspedu.spring.service.MemberServiceImpl;
import com.hspedu.spring.web.OrderAction;
import org.junit.Test;
import org.springframework.context.ApplicationContext;
import org.springframework.context.ConfigurableApplicationContext;
import org.springframework.context.support.ClassPathXmlApplicationContext;import java.awt.print.Book;public class SpringBeanTest {//通过注解来配置Bean
    @Testpublic void setProByAutowired() {ApplicationContext ioc =new ClassPathXmlApplicationContext("beans.xml");UserService userService = ioc.getBean("userService", UserService.class);System.out.println("ioc容器中的userService=" + userService);UserService userService200 = ioc.getBean("userService200", UserService.class);System.out.println("ioc容器中的userService200=" + userService200);UserAction userAction = ioc.getBean("userAction", UserAction.class);//System.out.println("ioc容器中的userAction=" + userAction);
        userAction.sayOk();}
}
运行结果:

80,自动装配@Resource
代码结构和上一节一样,UserAction.java, SpringBeanTest.java 改变了
UserAction.java
package com.hspedu.spring.component;import org.springframework.beans.factory.annotation.Autowired;
import org.springframework.stereotype.Controller;
import sun.java2d.pipe.SpanIterator;import javax.annotation.Resource;/** 使用 @Controller 标识该类是一个控制器Controller,通常这个类是一个Servlet*/
@Controller()
public class UserAction {///老师说明 @Resource//1) @Resource有两个属性是比较重要的,分是name和type,Spring将@Resource注解的name属性解析为bean的名字,//  而type属性则解析为bean的类型.所以如果使用name属性,则使用byName的自动注入策略,//  而使用type属性时则使用byType自动注入策略//  比如@Resource(name = "userService") 表示装配 id=userService对象//  比如@Resource(type = UserService.class) 表示按照UserService.class类型进行装配, 这时要求容器中,只能有一个这样类型的对象//2) 如果@Resource 没有指定 name 和 type ,则先使用byName注入策略,//   如果匹配不上, 再使用byType策略, 如果都不成功,就会报错//=================================//老师说明: @Autowired + @Qualifier(value = "userService02") 组合也可以完成指定 name/id 来进行自动装配//指定id进行组装, 也可以使用@Autowired 和 @Qualifier(value = "userService02")// 这时,是装配的 id=userService02 , 需要两个注解都需要写上,用@Resource(name="userSerice200") 更简单
//@Resource(name="userService200") @Resource(type = UserService.class) private UserService userService400; public void sayOk() { // System.out.println("UserAction.userService=" + userService); // System.out.println("userAction 装配的 userService属性=" + userService); System.out.println("userAction 装配的 userService属性=" + userService400); userService400.hi(); } }
SpringBeanTest.java
package com.hspedu.spring.test;import com.hspedu.spring.bean.*;
import com.hspedu.spring.component.MyComponent;
import com.hspedu.spring.component.UserAction;
import com.hspedu.spring.component.UserDao;
import com.hspedu.spring.component.UserService;
import com.hspedu.spring.factory.MyStaticFactory;
import com.hspedu.spring.service.MemberServiceImpl;
import com.hspedu.spring.web.OrderAction;
import org.junit.Test;
import org.springframework.context.ApplicationContext;
import org.springframework.context.ConfigurableApplicationContext;
import org.springframework.context.support.ClassPathXmlApplicationContext;import java.awt.print.Book;public class SpringBeanTest {//通过注解来配置Bean
    @Testpublic void setProByAutowired() {ApplicationContext ioc =new ClassPathXmlApplicationContext("beans.xml");UserService userService = ioc.getBean("userService", UserService.class);System.out.println("ioc容器中的userService=" + userService);//        UserService userService200 = ioc.getBean("userService200", UserService.class);
//        System.out.println("ioc容器中的userService200=" + userService200);
UserAction userAction = ioc.getBean("userAction", UserAction.class);//System.out.println("ioc容器中的userAction=" + userAction);
        userAction.sayOk();}
}
运行结果:

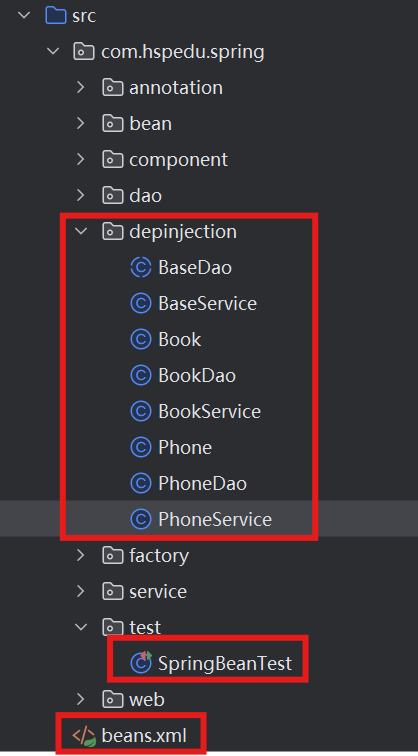
82,泛型依赖注入

各个类的关系图:
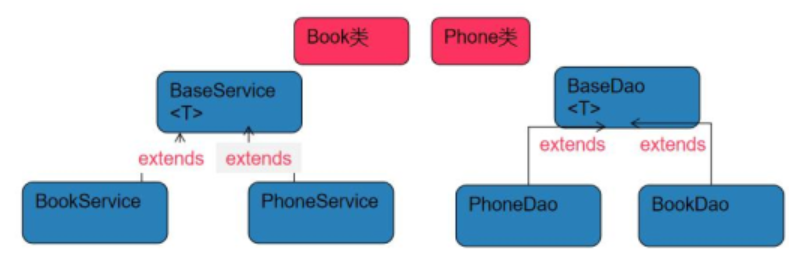
类关系图解释:
如果 BookService 想用到 BookDao,可以把BookDao属性装配到BookService上去,但问题是 BaseService 和 BaseDao 下有很多子类,写起来就很麻烦,所以spring提供了泛型依赖注入,就是把 BaseDao装配到BaseService上去,只是形式上的装配,不会实例化他们的对象,真正实现的是子类对象,在得到BookService的时候,传入泛型<Book>,根据泛型依赖装配,会自动把BookDao对象装配到 BookService上去
底层机制 是 : 反射+注解+IO+String+泛型.
代码结构:
Book.java
package com.hspedu.spring.depinjection;public class Book {
}
Phone.java
package com.hspedu.spring.depinjection;public class Phone {
}
BaseDao.java
package com.hspedu.spring.depinjection;//自定义泛型类
public abstract class BaseDao<T> {public abstract void save();
}
BookDao.java
package com.hspedu.spring.depinjection;import org.springframework.stereotype.Repository;@Repository
public class BookDao extends BaseDao<Book>{@Overridepublic void save() {System.out.println("BookDao 的 save()..");}
}
PhoneDao.java
package com.hspedu.spring.depinjection;import org.springframework.stereotype.Repository;@Repository
public class PhoneDao extends BaseDao<Phone>{@Overridepublic void save() {System.out.println("PhoneDao save()");}
}
BaseService.java
package com.hspedu.spring.depinjection;import org.springframework.beans.factory.annotation.Autowired;public class BaseService<T> {@Autowiredprivate BaseDao<T> baseDao;public void save(){baseDao.save();}
}
BookService.java
package com.hspedu.spring.depinjection;import org.springframework.stereotype.Service;@Service
public class BookService extends BaseService<Book>{//并没有写属性
}
PhoneService.java
package com.hspedu.spring.depinjection;import org.springframework.stereotype.Service;@Service
public class PhoneService extends BaseService<Phone>{//是把PhoneDao对象装配到PhoneService,spring底层支持的
}
beans.xml
<?xml version="1.0" encoding="UTF-8"?>
<beans xmlns="http://www.springframework.org/schema/beans"xmlns:xsi="http://www.w3.org/2001/XMLSchema-instance" xmlns:util="http://www.springframework.org/schema/util"xmlns:context="http://www.springframework.org/schema/context"xmlns:contect="http://www.springframework.org/schema/c"xsi:schemaLocation="http://www.springframework.org/schema/beans http://www.springframework.org/schema/beans/spring-beans.xsd http://www.springframework.org/schema/util https://www.springframework.org/schema/util/spring-util.xsd http://www.springframework.org/schema/context https://www.springframework.org/schema/context/spring-context.xsd"><context:component-scanbase-package="com.hspedu.spring.depinjection"/>
</beans>
SpringBeanTest.java
package com.hspedu.spring.test;import com.hspedu.spring.bean.*;
import com.hspedu.spring.component.MyComponent;
import com.hspedu.spring.component.UserAction;
import com.hspedu.spring.component.UserDao;
import com.hspedu.spring.component.UserService;
import com.hspedu.spring.depinjection.PhoneService;
import com.hspedu.spring.factory.MyStaticFactory;
import com.hspedu.spring.service.MemberServiceImpl;
import com.hspedu.spring.web.OrderAction;
import org.junit.Test;
import org.springframework.beans.BeansException;
import org.springframework.context.ApplicationContext;
import org.springframework.context.ConfigurableApplicationContext;
import org.springframework.context.support.ClassPathXmlApplicationContext;import java.awt.print.Book;public class SpringBeanTest {//通过泛型依赖来配置Bean
    @Testpublic void setProByDependencyInjection() throws BeansException {ApplicationContext ioc =new ClassPathXmlApplicationContext("beans.xml");PhoneService phoneService = ioc.getBean("phoneService", PhoneService.class);phoneService.save();}
}
运行结果:
![]()
86,传统方法解决动态代理需求
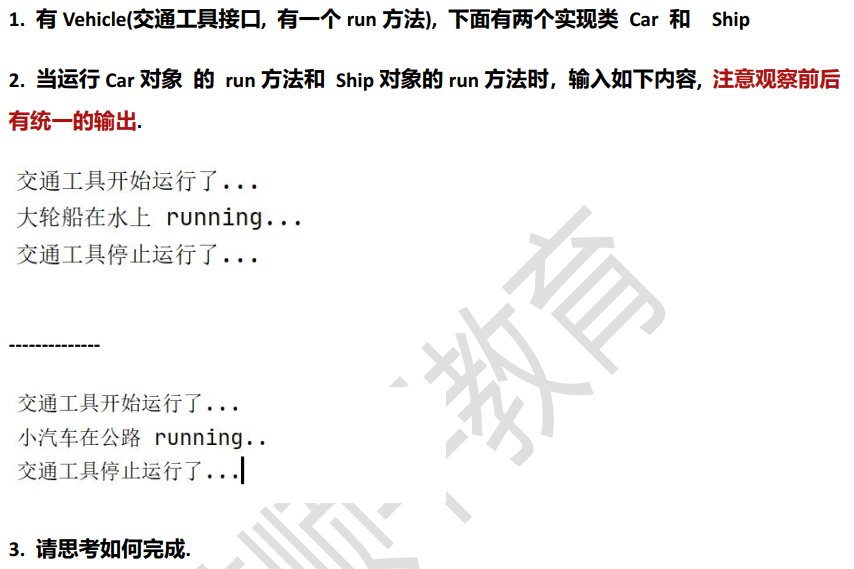
代码结构:
接口Vehicle.java
package com.hspedu.spring.proxy2;//该接口有run方法
public interface Vehicle {public void run();
}
Car.java
package com.hspedu.spring.proxy2;public class Car implements Vehicle{@Overridepublic void run() {System.out.println("交通工具开始运行了...");System.out.println("小汽车在公路 running..");System.out.println("交通工具停止运行了...");}
}
Ship.java
package com.hspedu.spring.proxy2;public class Ship implements Vehicle{@Overridepublic void run() {System.out.println("交通工具开始运行了...");System.out.println("大轮船在水上 running...");System.out.println("交通工具停止运行了...");}
}
TestVehicle.java
package com.hspedu.spring.proxy2;import org.junit.Test;public class TestVehicle {@Testpublic void run(){//OOP基础Vehicle vehicle = new Car();vehicle.run();System.out.println("----------------");Vehicle vehicle1 = new Ship();vehicle1.run();}
}
运行结果:


如果想改某几个对象,只能一个一个的改 ,得不到统一的管理
87,动态代理解决需求
动态代理解决思路,在调用方法时,使用反射机制,根据方法去决定调用哪个对象方法
代码结构:
Vehicle.java不变,动态代理机制是 debug得出的

Car.java
package com.hspedu.spring.proxy2;public class Car implements Vehicle{@Overridepublic void run() {//System.out.println("交通工具开始运行了...");System.out.println("小汽车在公路 running..");//System.out.println("交通工具停止运行了...");
    }
}
Ship.java
package com.hspedu.spring.proxy2;public class Ship implements Vehicle{@Overridepublic void run() {//System.out.println("交通工具开始运行了...");System.out.println("大轮船在水上 running...");//System.out.println("交通工具停止运行了...");
    }
}
VehicleProxyProvider.java
package com.hspedu.spring.proxy2;import java.lang.reflect.InvocationHandler;
import java.lang.reflect.Method;
import java.lang.reflect.Proxy;/*** VehicleProxyProvider 该类可以返回一个代理对象.*/
public class VehicleProxyProvider {//定义一个属性//target_vehicle 表示真正要执行的对象//该对象实现了Vehicle接口private Vehicle target_vehicle;//构造器public VehicleProxyProvider(Vehicle target_vehicle) {this.target_vehicle = target_vehicle;}//编写一个方法,可以返回一个代理对象, 该代理对象可以通过反射机制调用到被代理对象的方法//老师解读//1. 这个方法非常重要, 理解有一定难度public Vehicle getProxy() {//得到类加载器ClassLoader classLoader =target_vehicle.getClass().getClassLoader();//得到要代理的对象/被执行对象 的接口信息,底层是通过接口来完成调用Class<?>[] interfaces = target_vehicle.getClass().getInterfaces();//创建InvocationHandler 对象//因为 InvocationHandler 是接口,所以我们可以通过匿名对象的方式来创建该对象
InvocationHandler invocationHandler = new InvocationHandler() {/*** invoke 方法是将来执行我们的target_vehicle的方法时,会调用到* o: 表示代理对象* method: 就是通过代理对象调用方法时,的哪个方法 代理对象.run()* args: 表示调用 代理对象.run(xx) 传入的参数* return: 表示 代理对象.run(xx) 执行后的结果*/@Overridepublic Object invoke(Object o, Method method, Object[] args)throws Throwable {System.out.println("交通工具开始运行了....");//这里是我们的反射基础 => OOP//method 是?: public abstract void com.hspedu.spring.proxy2.Vehicle.run()//target_vehicle 是? Ship对象//args 是null//这里通过反射+动态绑定机制,就会执行到被代理对象的方法//执行完毕就返回Object result = method.invoke(target_vehicle, args);System.out.println("交通工具停止运行了....");return result;}};/**public static Object newProxyInstance(ClassLoader loader,Class<?>[] interfaces,InvocationHandler h)老师解读1. Proxy.newProxyInstance() 可以返回一个代理对象2. ClassLoader loader: 类的加载器.3. Class<?>[] interfaces 就是将来要代理的对象的接口信息4. InvocationHandler h 调用处理器/对象 有一个非常重要的方法invoke*/Vehicle proxy =(Vehicle) Proxy.newProxyInstance(classLoader, interfaces, invocationHandler);return proxy;}
}
TestVehicle.java
package com.hspedu.spring.proxy2;import org.junit.Test;public class TestVehicle {@Testpublic void run(){//OOP基础Vehicle vehicle = new Car();//创建VehicleProxyProvider对象, 并且我们传入的要代理的对象VehicleProxyProvider vehicleProxyProvider =new VehicleProxyProvider(vehicle);//获取代理对象, 该对象可以代理执行方法//老师解读//1. porxy 编译类型 Vehicle//2. 运行类型 是代理类型 class com.sun.proxy.$Proxy9Vehicle proxy = vehicleProxyProvider.getProxy();System.out.println("proxy的编译类型是 Vehicle");System.out.println("proxy的运行类型是 " + proxy.getClass());//下面老韩就要给大家解读/debug怎么 执行到 代理对象的 public Object invoke(Object o, Method method, Object[] args)//梳理完毕. proxy的编译类型是 Vehicle, 运行类型是 class com.sun.proxy.$Proxy9//所以当执行run方法时,会执行到 代理对象的invoke//如何体现动态 [1. 被代理的对象 2. 方法]//1. proxy 运行类型是 com.sun.proxy.$Proxy0 该类型被转型成 Vehicle// 因此可以调用 Vehicle 的接口方法//2. 当执行 run() 的时候会调用, 根据 Java 的动态绑定机制, 这时直接调用 Car的 run(),// 而是 proxy 对象的 invocationHandler 的 invoke 方法(!!!!!!)//3. invoke 方法使用反射机制来调用 run()方法注意这个 run 方法也可以是Vehicle 的其它方法)// 这时就可以在调用 run()方法前,进行前置处理和后置处理//4. 也就是说 proxy 的 target_vehicle 运行类型只要是实现了 Vehicle 接口// ,就可以去调用不同的方法, 是动态的,变化的,底层就是 使用反射完成的.
        proxy.run();}
}
运行结果:

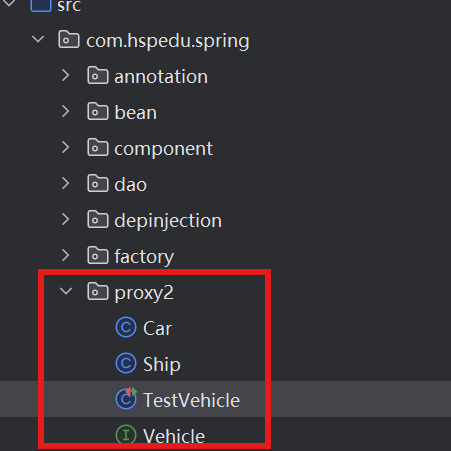
91,动态代理深入(传统方法解决)

传统的解决思路,在各个方法的[前,执行过程, 后]输出日志。
代码结构:
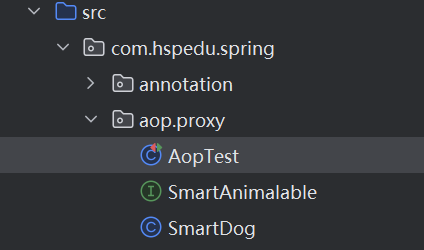
SmartAnimalable.java
package com.hspedu.spring.aop.proxy;//接口
public interface SmartAnimalable {//求和float getSum(float i, float j);//求差float getSub(float i, float j);
}
SmartDog.java
package com.hspedu.spring.aop.proxy;public class SmartDog implements SmartAnimalable{@Overridepublic float getSum(float i, float j) {System.out.println("日志-方法名-getSum-参数 " + i + " " + j);float result = i + j;System.out.println("方法内部打印result = " + result);System.out.println("日志-方法名-getSum-结果result= " + result);return result;}@Overridepublic float getSub(float i, float j) {System.out.println("日志-方法名-getSub-参数 " + i + " " + j);float result = i - j;System.out.println("方法内部打印result = " + result);System.out.println("日志-方法名-getSub-结果result= " + result);return result;}
}
AopTest.java
package com.hspedu.spring.aop.proxy;import org.junit.Test;public class AopTest {@Testpublic void smartDogTest() {SmartAnimalable smartAnimalable = new SmartDog();smartAnimalable.getSum(10, 2);System.out.println("===========================");smartAnimalable.getSub(10, 2);}
}
运行结果:

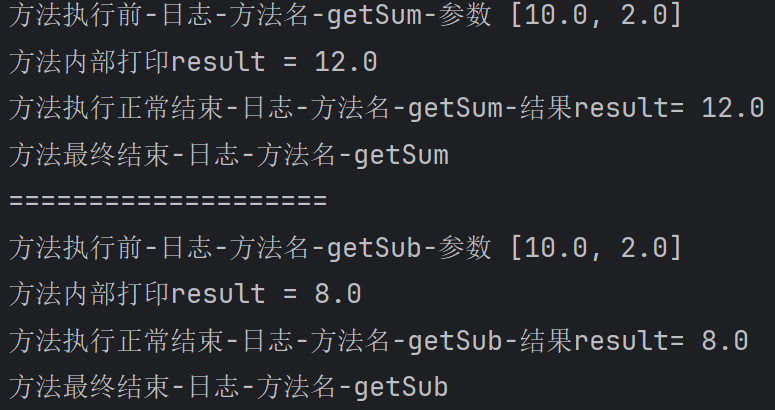
93,动态代理深入(动态代理方式解决)
代码结构:
SmartAnimalable.java不变

SmartDog.java
package com.hspedu.spring.aop.proxy;public class SmartDog implements SmartAnimalable{@Overridepublic float getSum(float i, float j) {//System.out.println("日志-方法名-getSum-参数 " + i + " " + j);float result = i + j;System.out.println("方法内部打印result = " + result);//System.out.println("日志-方法名-getSum-结果result= " + result);return result;}@Overridepublic float getSub(float i, float j) {//System.out.println("日志-方法名-getSub-参数 " + i + " " + j);float result = i - j;System.out.println("方法内部打印result = " + result);//System.out.println("日志-方法名-getSub-结果result= " + result);return result;}
}
MyProxyProvider.java
package com.hspedu.spring.aop.proxy;import java.lang.reflect.InvocationHandler;
import java.lang.reflect.Method;
import java.lang.reflect.Proxy;
import java.util.Arrays;/*** 可以返回一个动态代理对象, 可以执行SmartDog对象的方法*/
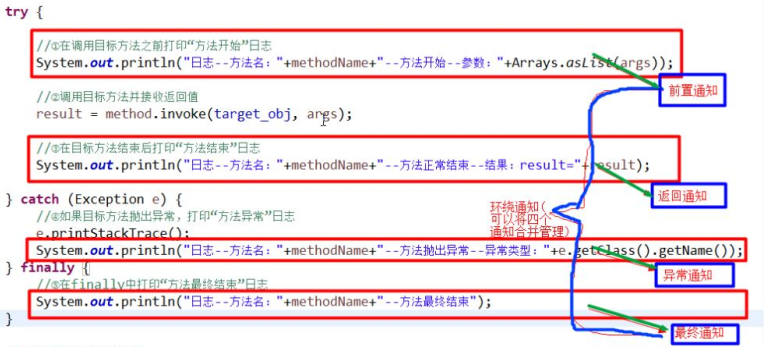
public class MyProxyProvider {//定义我们要执行的目标对象, 该对象需要实现SmartAnimalableprivate SmartAnimalable target_obj;//构造器public MyProxyProvider(SmartAnimalable target_obj) {this.target_obj = target_obj;}//方法, 可以返回代理对象,该代理对象可以执行目标对象public SmartAnimalable getProxy() {//1. 先到的类加载器/对象ClassLoader classLoader = target_obj.getClass().getClassLoader();//2. 得到要执行的目标对象的接口信息Class<?>[] interfaces = target_obj.getClass().getInterfaces();//3. 创建InvocationHandlerInvocationHandler invocationHandler = new InvocationHandler() {@Overridepublic Object invoke(Object proxy, Method method, Object[] args) throws Throwable {Object result = null;try {System.out.println("方法执行前-日志-方法名-" + method.getName() + "-参数 "+ Arrays.asList(args)); //这里从AOP看,就是一个横切关注点-前置通知//使用反射调用方法result = method.invoke(target_obj, args);System.out.println("方法执行正常结束-日志-方法名-" + method.getName() + "-结果result= "+ result);//从AOP看, 也是一个横切关注点-返回通知
} catch (Exception e) {e.printStackTrace();//如果反射执行方法时,出现异常,就会进入到catch{}System.out.println("方法执行异常-日志-方法名-" + method.getName()+ "-异常类型=" + e.getClass().getName());//从AOP看, 也是一个横切关注点-异常通知} finally {//不管你是否出现异常,最终都会执行到finally{}//从AOP的角度看, 也是一个横切关注点-最终通知System.out.println("方法最终结束-日志-方法名-" + method.getName());}return result;}};//创建代理对象SmartAnimalable proxy =(SmartAnimalable) Proxy.newProxyInstance(classLoader, interfaces, invocationHandler);return proxy;}
}
AopTest.java
package com.hspedu.spring.aop.proxy;import org.junit.Test;public class AopTest {@Testpublic void smartDogTestByProxy() {SmartAnimalable smartAnimalable = new SmartDog();//创建MyProxyProvider对象, 并且我们传入的要代理的对象MyProxyProvider myProxyProvider =new MyProxyProvider(smartAnimalable);//获取代理对象, 该对象可以代理执行方法SmartAnimalable proxy =myProxyProvider.getProxy();proxy.getSum(10, 2);System.out.println("====================");proxy.getSub(10, 2);}
}
运行结果:
95,AOP快速入门
基本介绍
可以把切面类里的方法(想象成一把刀)切入到A类,B类任意一个位置
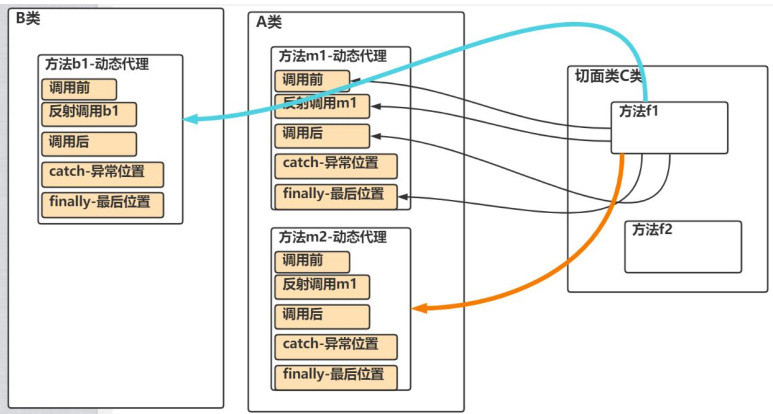

案例:

![]()
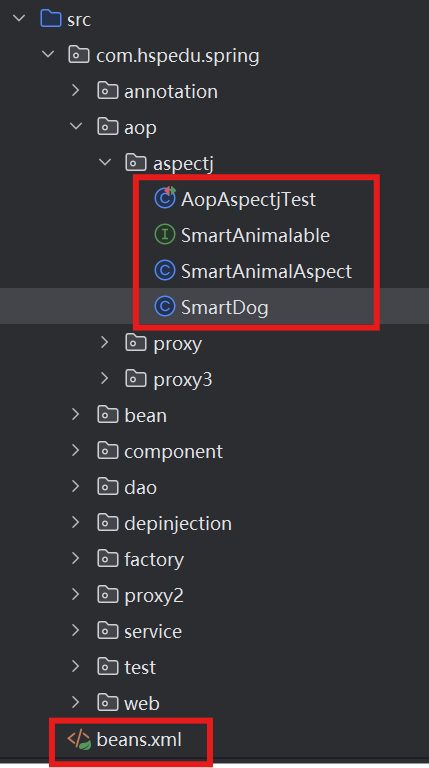
代码结构:
SmartAnimalable.java
package com.hspedu.spring.aop.aspectj;//接口
public interface SmartAnimalable {//求和float getSum(float i, float j);//求差float getSub(float i, float j);
}
SmartDog.java
package com.hspedu.spring.aop.aspectj;import org.springframework.stereotype.Component;@Component //使用@Component 当spring容器启动时,将 SmartDog注入到容器
public class SmartDog implements SmartAnimalable {@Overridepublic float getSum(float i, float j) {float result = i + j;//int res = 9 / 0; //模拟一个算术异常System.out.println("方法内部打印result = " + result);return result;}@Overridepublic float getSub(float i, float j) {float result = i - j;System.out.println("方法内部打印result = " + result);return result;}
}
SmartAnimalAspect.java
package com.hspedu.spring.aop.aspectj;import org.aspectj.lang.JoinPoint;
import org.aspectj.lang.ProceedingJoinPoint;
import org.aspectj.lang.Signature;
import org.aspectj.lang.annotation.*;
import org.aspectj.lang.reflect.MethodSignature;
import org.springframework.core.annotation.Order;
import org.springframework.stereotype.Component;import java.lang.annotation.Annotation;
import java.lang.reflect.Method;
import java.util.Arrays;/*** 切面类 , 类似于我们以前自己写的MyProxyProvider,但是功能强大很多*/
//@Order(value = 2)//表示该切面类执行的顺序, value的值越小, 优先级越高
@Aspect //表示是一个切面类[底层切面编程的支撑(动态代理+反射+动态绑定...)]
@Component //会注入SmartAnimalAspect到容器
public class SmartAnimalAspect {//定义一个切入点, 在后面使用时可以直接引用, 提高了复用性@Pointcut(value = "execution(public float com.hspedu.spring.aop.aspectj.SmartDog.getSum(float, float)))")public void myPointCut() {}/*** 老师解读* 1. @Before 表示前置通知:即在我们的目标对象执行方法前执行* 2. value = "execution(public float com.hspedu.spring.aop.aspectj.SmartDog.getSum(float, float)* 指定切入到哪个类的哪个方法  形式是: 访问修饰符 返回类型 全类名.方法名(形参列表)* 3. showBeginLog方法可以理解成就是一个切入方法, 这个方法名是可以程序员指定  比如:showBeginLog* 4. JoinPoint joinPoint 在底层执行时,由AspectJ切面框架, 会给该切入方法传入 joinPoint对象* , 通过该方法,程序员可以获取到 相关信息** @param joinPoint*///希望将f1方法切入到SmartDog-getSum前执行-前置通知//@Before(value = "execution(public float com.hspedu.spring.aop.aspectj.SmartDog.getSum(float, float))")//这里我们使用定义好的切入点@Before(value = "myPointCut()")public void showBeginLog(JoinPoint joinPoint) {//通过连接点对象joinPoint 可以获取方法签名Signature signature = joinPoint.getSignature();System.out.println("SmartAnimalAspect-切面类showBeginLog()[使用的myPointCut()]-方法执行前-日志-方法名-" + signature.getName() + "-参数 "+ Arrays.asList(joinPoint.getArgs()));}//返回通知:即把showSuccessEndLog方法切入到目标对象方法正常执行完毕后的地方//老韩解读//1. 如果我们希望把目标方法执行的结果,返回给切入方法//2. 可以再 @AfterReturning 增加属性 , 比如 returning = "res"//3. 同时在切入方法增加 Object res//4. 注意: returning = "res" 和 Object res 的 res名字一致//@AfterReturning(value = "execution(public float com.hspedu.spring.aop.aspectj.SmartDog.getSum(float, float))", returning = "res")//使用切入点@AfterReturning(value = "myPointCut()", returning = "res")public void showSuccessEndLog(JoinPoint joinPoint, Object res) {Signature signature = joinPoint.getSignature();System.out.println("SmartAnimalAspect-切面类showSuccessEndLog()-方法执行正常结束-日志-方法名-" + signature.getName() + " 返回的结果是=" + res);}//异常通知:即把showExceptionLog方法切入到目标对象方法执行发生异常的的catch{}//@AfterThrowing(value = "execution(public float com.hspedu.spring.aop.aspectj.SmartDog.getSum(float, float))", throwing = "throwable")//直接使用切入点表达式@AfterThrowing(value = "myPointCut()", throwing = "throwable")public void showExceptionLog(JoinPoint joinPoint, Throwable throwable) {Signature signature = joinPoint.getSignature();System.out.println("SmartAnimalAspect-切面类showExceptionLog()-方法执行异常-日志-方法名-" + signature.getName() + " 异常信息=" + throwable);}//最终通知:即把showFinallyEndLog方法切入到目标方法执行后(不管是否发生异常,都要执行 finally{})//@After(value = "execution(public float com.hspedu.spring.aop.aspectj.SmartDog.getSum(float, float))")//直接使用切入点@After(value = "myPointCut()")public void showFinallyEndLog(JoinPoint joinPoint) {Signature signature = joinPoint.getSignature();System.out.println("SmartAnimalAspect-切面类showFinallyEndLog()-方法最终执行完毕-日志-方法名-" + signature.getName());}
}
beans.xml
<?xml version="1.0" encoding="UTF-8"?>
<beans xmlns="http://www.springframework.org/schema/beans"xmlns:xsi="http://www.w3.org/2001/XMLSchema-instance"xmlns:context="http://www.springframework.org/schema/context"xmlns:aop="http://www.springframework.org/schema/aop"xsi:schemaLocation="http://www.springframework.org/schema/beans http://www.springframework.org/schema/beans/spring-beans.xsd http://www.springframework.org/schema/context https://www.springframework.org/schema/context/spring-context.xsd http://www.springframework.org/schema/aop https://www.springframework.org/schema/aop/spring-aop.xsd"><context:component-scanbase-package="com.hspedu.spring.aop.aspectj"/><!-- 开启基于注解的AOP功能 --><aop:aspectj-autoproxy/>
</beans>
AopAspectjTest.java
package com.hspedu.spring.aop.aspectj;import org.junit.jupiter.api.Test;
import org.springframework.context.ApplicationContext;
import org.springframework.context.support.ClassPathXmlApplicationContext;public class AopAspectjTest {@Testpublic void smartDogTestByProxy(){//得到spring容器ApplicationContext ioc =new ClassPathXmlApplicationContext("beans.xml");//这里我们需要通过接口类型来获取到注入的SmartDog对象-就是代理对象SmartAnimalable smartAnimalable =ioc.getBean(SmartAnimalable.class);smartAnimalable.getSum(10, 2);
//        System.out.println("smartAnimalable运行类型="
//                + smartAnimalable.getClass());//class com.sun.proxy.$Proxy17
    }
}
运行结果:

代码里的getBean() 也相当于 动态代理里的 getProxy() ,返回的是代理对象。
108,课后作业

这个题用到了细节5 和 下节的 切入表达式。
细节:


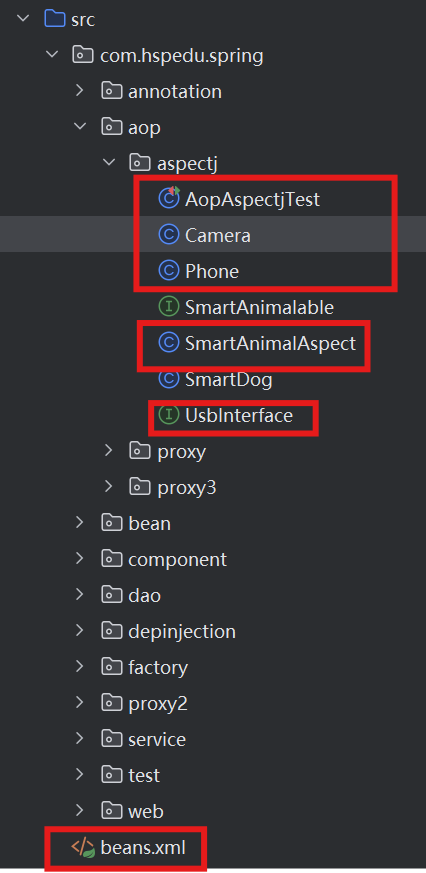
代码结构:
beans.xml 不变,和上节一样。
接口UsbInterface.java
package com.hspedu.spring.aop.aspectj;public interface UsbInterface {public void work();
}
Phone.java
package com.hspedu.spring.aop.aspectj;import org.springframework.stereotype.Component;@Component//将Phone对象当做一个组件注入容器
public class Phone implements UsbInterface{@Overridepublic void work() {System.out.println("手机开始工作了...");}}
Camera.java
package com.hspedu.spring.aop.aspectj;import org.springframework.stereotype.Component;@Component//将Camera对象当做一个组件注入容器
public class Camera implements UsbInterface{@Overridepublic void work() {System.out.println("相机开始工作了...");}
}
SmartAnimalAspect.java
package com.hspedu.spring.aop.aspectj;import org.aspectj.lang.JoinPoint;
import org.aspectj.lang.ProceedingJoinPoint;
import org.aspectj.lang.Signature;
import org.aspectj.lang.annotation.*;
import org.aspectj.lang.reflect.MethodSignature;
import org.springframework.core.annotation.Order;
import org.springframework.stereotype.Component;import java.lang.annotation.Annotation;
import java.lang.reflect.Method;
import java.util.Arrays;/*** 切面类 , 类似于我们以前自己写的MyProxyProvider,但是功能强大很多*/
//@Order(value = 2)//表示该切面类执行的顺序, value的值越小, 优先级越高
@Aspect //表示是一个切面类[底层切面编程的支撑(动态代理+反射+动态绑定...)]
@Component //会注入SmartAnimalAspect到容器
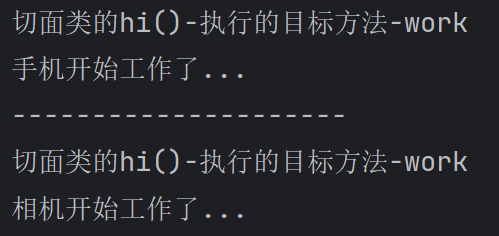
public class SmartAnimalAspect {@Before(value = "execution(public void com.hspedu.spring.aop.aspectj.Phone.work()) || execution(public void com.hspedu.spring.aop.aspectj.Camera.work())")public void hi(JoinPoint joinPoint) {Signature signature = joinPoint.getSignature();System.out.println("切面类的hi()-执行的目标方法-" + signature.getName());}
}
AopAspectjTest.java
package com.hspedu.spring.aop.aspectj;import org.junit.jupiter.api.Test;
import org.springframework.context.ApplicationContext;
import org.springframework.context.support.ClassPathXmlApplicationContext;public class AopAspectjTest {@Testpublic void smartDogTestByProxy(){//得到spring容器ApplicationContext ioc =new ClassPathXmlApplicationContext("beans.xml");//这里我们不能通过接口类型来获取到注入的Phone对象-就是代理对象,因为Phone对象和Camera对象都实现了UsbInterface接口
//        UsbInterface bean = ioc.getBean(UsbInterface.class);
//        bean.work();
UsbInterface phone = (UsbInterface) ioc.getBean("phone");UsbInterface camera = (UsbInterface) ioc.getBean("camera");phone.work();System.out.println("---------------------");camera.work();}
}
运行结果:
109,切入表达式
具体使用:
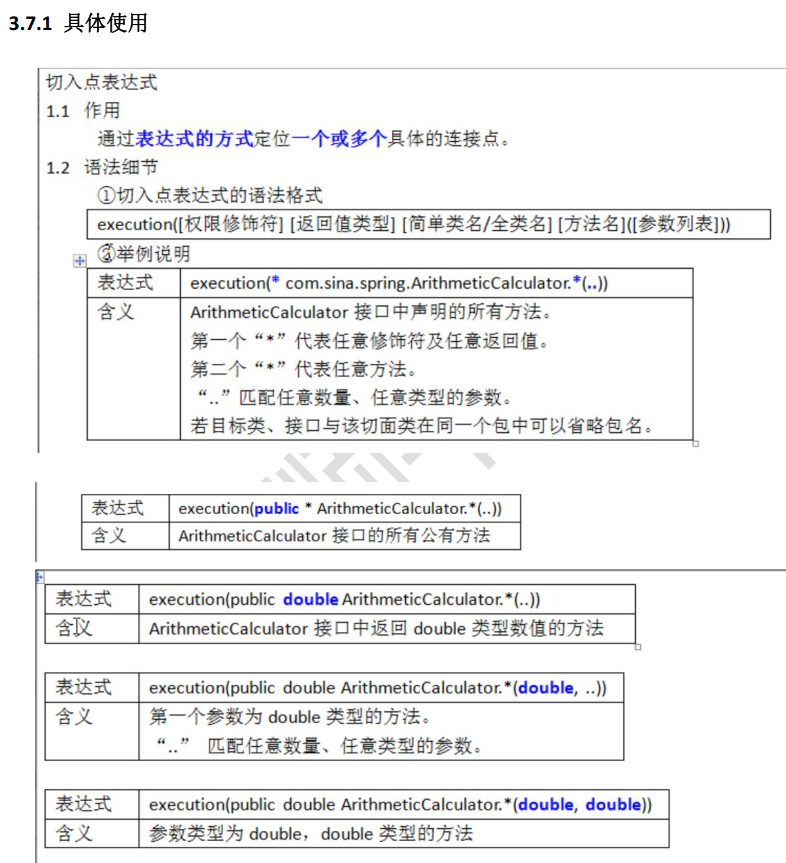

细节:
细节3代码结构:
beans.xml和上上一节一样。

Car.java
package com.hspedu.spring.aop.aspectj;import org.springframework.stereotype.Component;@Component//将Phone对象当做一个组件注入容器
public class Car {public void run(){System.out.println("小汽车在running...");}
}
SmartAnimalAspect.java
package com.hspedu.spring.aop.aspectj;import org.aspectj.lang.JoinPoint;
import org.aspectj.lang.ProceedingJoinPoint;
import org.aspectj.lang.Signature;
import org.aspectj.lang.annotation.*;
import org.aspectj.lang.reflect.MethodSignature;
import org.springframework.core.annotation.Order;
import org.springframework.stereotype.Component;import java.lang.annotation.Annotation;
import java.lang.reflect.Method;
import java.util.Arrays;/*** 切面类 , 类似于我们以前自己写的MyProxyProvider,但是功能强大很多*/
//@Order(value = 2)//表示该切面类执行的顺序, value的值越小, 优先级越高
@Aspect //表示是一个切面类[底层切面编程的支撑(动态代理+反射+动态绑定...)]
@Component //会注入SmartAnimalAspect到容器
public class SmartAnimalAspect {//给Car配置一个前置通知@Before(value = "execution(public void com.hspedu.spring.aop.aspectj.Car.run())")public void ok1(JoinPoint joinPoint) {Signature signature = joinPoint.getSignature();System.out.println("切面类的ok1()-执行的目标方法-" + signature.getName());}
}
AopAspectjTest.java
package com.hspedu.spring.aop.aspectj;import org.junit.jupiter.api.Test;
import org.springframework.context.ApplicationContext;
import org.springframework.context.support.ClassPathXmlApplicationContext;public class AopAspectjTest {@Testpublic void smartDogTestByProxy(){//得到spring容器ApplicationContext ioc =new ClassPathXmlApplicationContext("beans.xml");//Car对象仍然是代理对象Car car = ioc.getBean(Car.class);car.run();System.out.println("car的运行类型=" + car.getClass());}
}
运行结果:

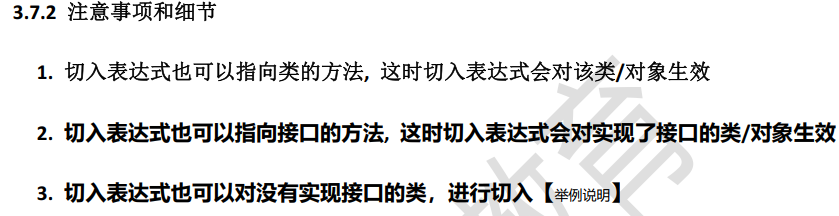
115,环绕通知
![]()
在第 95节代码的基础上修改 ,可以把 SmartAnimalAspect.java删了,重新复制成 SmartAnimalAspect2.java,还要修改 AopAspectjTest.java
SmartAnimalAspect2.java
package com.hspedu.spring.aop.aspectj;import org.aspectj.lang.ProceedingJoinPoint;
import org.aspectj.lang.annotation.*;
import org.springframework.stereotype.Component;import java.util.Arrays;
import java.util.List;/*** @author 韩顺平* @version 1.0* 切面类 , 类似于我们以前自己写的MyProxyProvider,但是功能强大很多*/
@Aspect //表示是一个切面类[底层切面编程的支撑(动态代理+反射+动态绑定...)]
@Component //会注入SmartAnimalAspect2到容器
public class SmartAnimalAspect2 {//演示环绕通知的使用-了解//老师解读//1. @Around: 表示这是一个环绕通知[完成其它四个通知的功能]//2. value = "execution(public float com.hspedu.spring.aop.aspectj.SmartDog.getSum(float, float)) 切入点表达式//3. doAround 表示要切入的方法 - 调用结构 try-catch-finally@Around(value = "execution(public float com.hspedu.spring.aop.aspectj.SmartDog.getSum(float, float))")public Object doAround(ProceedingJoinPoint joinPoint) {Object result = null;String methodName = joinPoint.getSignature().getName();try {//1.相当于前置通知完成的事情Object[] args = joinPoint.getArgs();List<Object> argList = Arrays.asList(args);System.out.println("AOP环绕通知[-前置通知]" + methodName + "方法开始了--参数有:" + argList);//在环绕通知中一定要调用joinPoint.proceed()来执行目标方法result = joinPoint.proceed();//2.相当于返回通知完成的事情System.out.println("AOP环绕通知[-返回通知]" + methodName + "方法结束了--结果是:" + result);} catch (Throwable throwable) {//3.相当于异常通知完成的事情System.out.println("AOP环绕通知[-异常通知]" + methodName + "方法抛异常了--异常对象:" + throwable);} finally {//4.相当于最终通知完成的事情System.out.println("AOP环绕通知[-后置通知]" + methodName + "方法最终结束了...");}return result;}
}
AopAspectjTest.java
package com.hspedu.spring.aop.aspectj;import org.junit.jupiter.api.Test;
import org.springframework.context.ApplicationContext;
import org.springframework.context.support.ClassPathXmlApplicationContext;public class AopAspectjTest {@Testpublic void testDoAround() {//得到spring容器ApplicationContext ioc =new ClassPathXmlApplicationContext("beans.xml");SmartAnimalable smartAnimalable =ioc.getBean(SmartAnimalable.class);smartAnimalable.getSum(10, 2);}
}
运行结果:

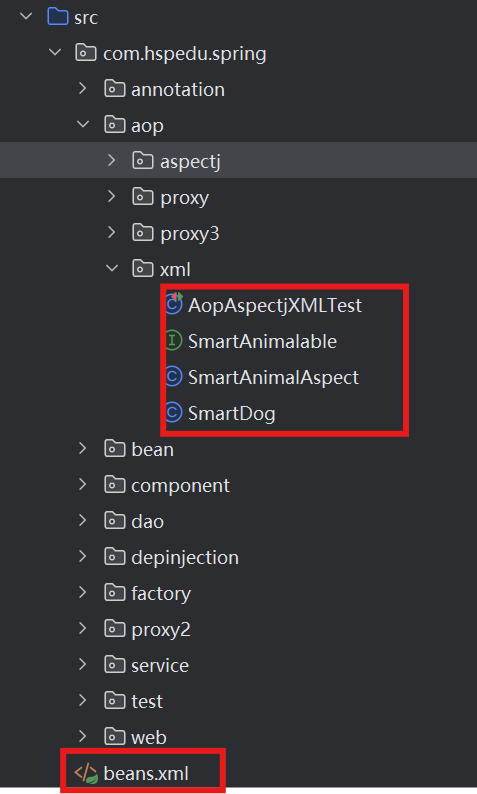
119,基于XML配置的AOP
![]()
代码结构:
SmartAnimalable.java 和第95节的一样,就是要注意 import 那引入的包名。
SmartDog.java 把@Component 注解注释了。
SmartAnimalAspect.java
package com.hspedu.spring.aop.xml;import org.aspectj.lang.JoinPoint;
import org.aspectj.lang.Signature;
import org.aspectj.lang.annotation.After;
import org.aspectj.lang.annotation.AfterReturning;
import org.aspectj.lang.annotation.AfterThrowing;
import org.aspectj.lang.annotation.Before;import java.util.Arrays;/*** @author 韩顺平* @version 1.0** 这是我们开发一个切面类, 但是不用注解,而是使用XML配置*/
public class SmartAnimalAspect {public void showBeginLog(JoinPoint joinPoint) {//通过连接点对象joinPoint 可以获取方法签名Signature signature = joinPoint.getSignature();System.out.println("SmartAnimalAspect-XML配置-切面类showBeginLog()[使用的myPointCut()]-方法执行前-日志-方法名-" + signature.getName() + "-参数 "+ Arrays.asList(joinPoint.getArgs()));}public void showSuccessEndLog(JoinPoint joinPoint, Object res) {Signature signature = joinPoint.getSignature();System.out.println("SmartAnimalAspect-XML配置-切面类showSuccessEndLog()-方法执行正常结束-日志-方法名-" + signature.getName() + " 返回的结果是=" + res);}public void showExceptionLog(JoinPoint joinPoint, Throwable throwable) {Signature signature = joinPoint.getSignature();System.out.println("SmartAnimalAspect-XML配置-切面类showExceptionLog()-方法执行异常-日志-方法名-" + signature.getName() + " 异常信息=" + throwable);}public void showFinallyEndLog(JoinPoint joinPoint) {Signature signature = joinPoint.getSignature();System.out.println("SmartAnimalAspect-XML配置-切面类showFinallyEndLog()-方法最终执行完毕-日志-方法名-" + signature.getName());}
}
beans.xml
<?xml version="1.0" encoding="UTF-8"?>
<beans xmlns="http://www.springframework.org/schema/beans"xmlns:xsi="http://www.w3.org/2001/XMLSchema-instance"xmlns:context="http://www.springframework.org/schema/context"xmlns:aop="http://www.springframework.org/schema/aop"xsi:schemaLocation="http://www.springframework.org/schema/beans http://www.springframework.org/schema/beans/spring-beans.xsd http://www.springframework.org/schema/context https://www.springframework.org/schema/context/spring-context.xsd http://www.springframework.org/schema/aop https://www.springframework.org/schema/aop/spring-aop.xsd"><!--使用XML配置,完成AOP编程--><!--配置一个切面类对象-bean--><bean class="com.hspedu.spring.aop.xml.SmartAnimalAspect" id="smartAnimalAspect"/><!--配置一个SmartDog对象-bean--><bean class="com.hspedu.spring.aop.xml.SmartDog" id="smartDog"/><!--配置切面类, 细节一定要引入 xmlns:aop--><aop:config><!--配置切入点--><aop:pointcut id="myPointCut" expression="execution(public float com.hspedu.spring.aop.xml.SmartDog.getSum(float, float)))"/><!--这里指定切面对象,切面的前置,返回, 异常, 最终通知--><aop:aspect ref="smartAnimalAspect" order="10"><!--配置前置通知--><aop:before method="showBeginLog" pointcut-ref="myPointCut"/><!--返回通知--><aop:after-returning method="showSuccessEndLog" pointcut-ref="myPointCut" returning="res"/><!--异常通知--><aop:after-throwing method="showExceptionLog" pointcut-ref="myPointCut" throwing="throwable"/><!--最终通知--><aop:after method="showFinallyEndLog" pointcut-ref="myPointCut"/><!--配置环绕通知--><!--<aop:around method=""/>--></aop:aspect></aop:config>
</beans>
AopAspectjXMLTest.java
package com.hspedu.spring.aop.xml;import org.junit.jupiter.api.Test;
import org.springframework.context.ApplicationContext;
import org.springframework.context.support.ClassPathXmlApplicationContext;public class AopAspectjXMLTest {@Testpublic void testDoAround() {//得到spring容器ApplicationContext ioc =new ClassPathXmlApplicationContext("beans.xml");SmartAnimalable smartAnimalable =ioc.getBean(SmartAnimalable.class);smartAnimalable.getSum(10, 2);}
}
运行结果:

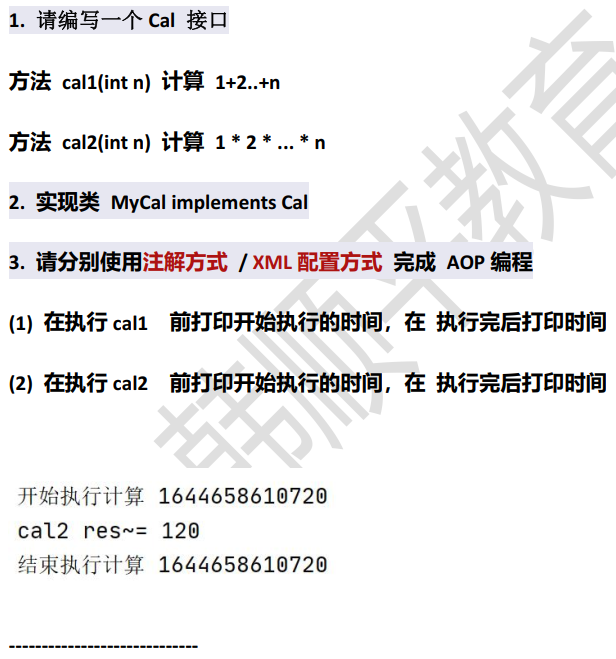
123,作业(注解方式)
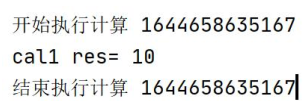
代码结构:
Cal.java
package com.hspedu.spring.aop.homework;public interface Cal {public int cal1(int n);public int cal2(int n);
}
MyCal.java
package com.hspedu.spring.aop.homework;import org.springframework.stereotype.Component;@Component//将MyCal对象当做一个组件注入容器
public class MyCal implements Cal{@Overridepublic int cal1(int n) {int res = 1;for(int i = 1; i <= n; i++) {res += i;}System.out.println("cal1 执行结果=" + res);return res;}@Overridepublic int cal2(int n) {int res = 1;for(int i = 1; i <= n; i++) {res *= i;}System.out.println("cal2 执行结果=" + res);return res;}
}
MyCalAop.java
package com.hspedu.spring.aop.homework;import org.aspectj.lang.JoinPoint;
import org.aspectj.lang.Signature;
import org.aspectj.lang.annotation.AfterReturning;
import org.aspectj.lang.annotation.Aspect;
import org.aspectj.lang.annotation.Before;
import org.springframework.stereotype.Component;@Aspect //MyCalAOP 是一个切面类
@Component //MyCalAOP/对象 作为组件注入到spring容器
public class MyCalAop {//前置通知//这里注意,如果目标类和切面类,在同一个包,可以省略包名//因为cal1和cal2方法,都要去输出开始执行时间,因此使用MyCal.*@Before(value = "execution(public int MyCal.*(int))")public void calStart(JoinPoint joinPoint) {Signature signature = joinPoint.getSignature();System.out.println(signature.getName() + " 执行, 开始执行时间=" + System.currentTimeMillis());}//返回通知//这里注意,如果目标类和切面类,在同一个包,可以省略包名//因为cal1和cal2方法,都要去输出开始执行时间,因此使用MyCal.*@AfterReturning(value = "execution(public int MyCal.*(int))")public void calEnd(JoinPoint joinPoint) {Signature signature = joinPoint.getSignature();System.out.println(signature.getName() + " 执行, 结束时间=" + System.currentTimeMillis());}
}
beans.xml
<?xml version="1.0" encoding="UTF-8"?>
<beans xmlns="http://www.springframework.org/schema/beans"xmlns:xsi="http://www.w3.org/2001/XMLSchema-instance"xmlns:context="http://www.springframework.org/schema/context"xmlns:aop="http://www.springframework.org/schema/aop"xsi:schemaLocation="http://www.springframework.org/schema/beans http://www.springframework.org/schema/beans/spring-beans.xsd http://www.springframework.org/schema/context https://www.springframework.org/schema/context/spring-context.xsd http://www.springframework.org/schema/aop https://www.springframework.org/schema/aop/spring-aop.xsd"><!--扫描指定包--><context:component-scanbase-package="com.hspedu.spring.aop.homework"/><!--启用基于注解的AOP功能--><aop:aspectj-autoproxy/>
</beans>
TestMyCalAOP.java
package com.hspedu.spring.aop.homework;import org.junit.jupiter.api.Test;
import org.springframework.context.ApplicationContext;
import org.springframework.context.support.ClassPathXmlApplicationContext;public class TestMyCalAOP {@Testpublic void testMyCalByAnnotation() {//得到spring容器ApplicationContext ioc =new ClassPathXmlApplicationContext("beans.xml");Cal cal = ioc.getBean(Cal.class);cal.cal1(10);System.out.println("-------------------------");cal.cal2(5);}
}
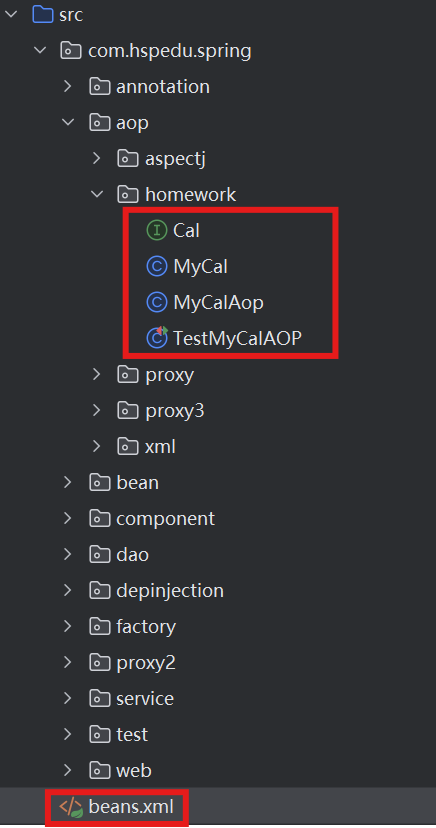
运行结果:
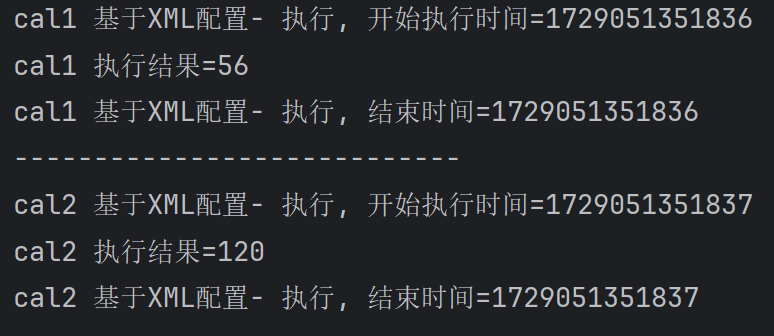
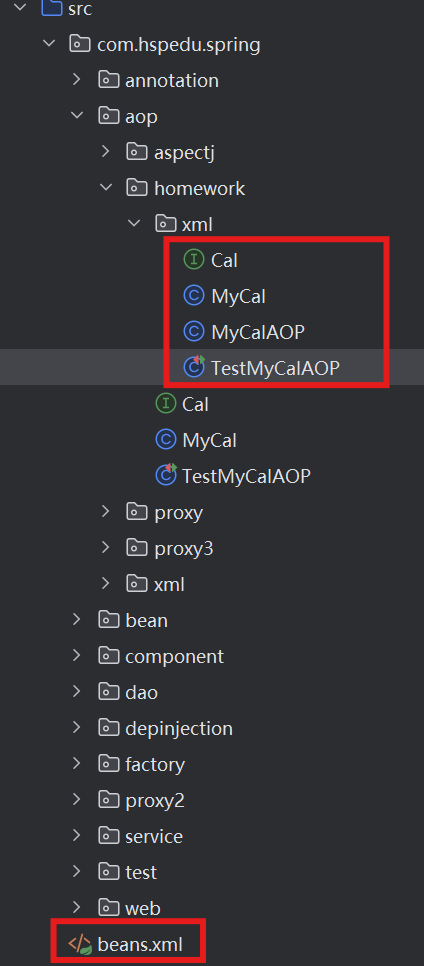
124,作业(基于XML)
代码结构:
Cal.java,MyCal.java , TestMyCalAOP.java和上节一样,要注意引入的包名。
MyCalAOP.java
package com.hspedu.spring.aop.homework.xml;import org.aspectj.lang.JoinPoint;
import org.aspectj.lang.Signature;public class MyCalAOP {//前置通知public void calStart(JoinPoint joinPoint) {Signature signature = joinPoint.getSignature();System.out.println(signature.getName() + " 基于XML配置- 执行, 开始执行时间=" + System.currentTimeMillis());}//返回通知public void calEnd(JoinPoint joinPoint) {Signature signature = joinPoint.getSignature();System.out.println(signature.getName() + " 基于XML配置- 执行, 结束时间=" + System.currentTimeMillis());}
}
beans.xml
<?xml version="1.0" encoding="UTF-8"?>
<beans xmlns="http://www.springframework.org/schema/beans"xmlns:xsi="http://www.w3.org/2001/XMLSchema-instance" xmlns:aop="http://www.springframework.org/schema/aop"xsi:schemaLocation="http://www.springframework.org/schema/beans http://www.springframework.org/schema/beans/spring-beans.xsd http://www.springframework.org/schema/aop https://www.springframework.org/schema/aop/spring-aop.xsd"><!--配置MyCalAOP-bean--><bean class="com.hspedu.spring.aop.homework.xml.MyCalAOP" id="myCalAOP" /><!--配置MyCal-bean--><bean class="com.hspedu.spring.aop.homework.xml.MyCal" id="myCal"/><!--配置切面类--><aop:config><!--配置切入点表达式--><aop:pointcut id="myPointCut" expression="execution(public int com.hspedu.spring.aop.homework.xml.MyCal.*(int))"/><!--配置前置,返回通知--><aop:aspect ref="myCalAOP" order="10"><aop:before method="calStart" pointcut-ref="myPointCut"/><aop:after-returning method="calEnd" pointcut-ref="myPointCut"/></aop:aspect></aop:config>
</beans>
运行结果: