1 前言
上节我们看了下 OpenFeign 里的重试,后来我从源码的角度看了下它的原理,发现一个诡异的情况,就是我没开启重试的情况下,我的服务却被调用了两次,这是为什么呢?本节我们来看看这个问题。
2 环境准备
首先准备一下,我这里有两个服务,一个是 demo 一个是 virtuous,本地启动的 Eureka。
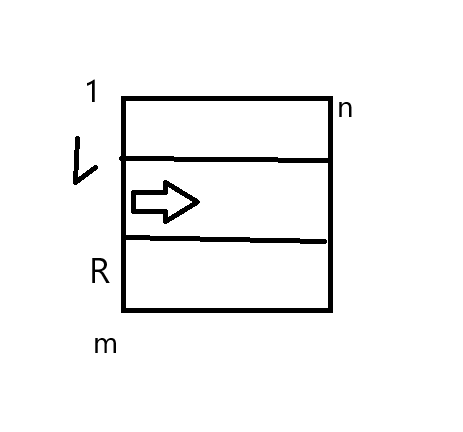
一个简单的调用过程,我这里简单画个图,这里比上节多了个 POST 方法的调用:
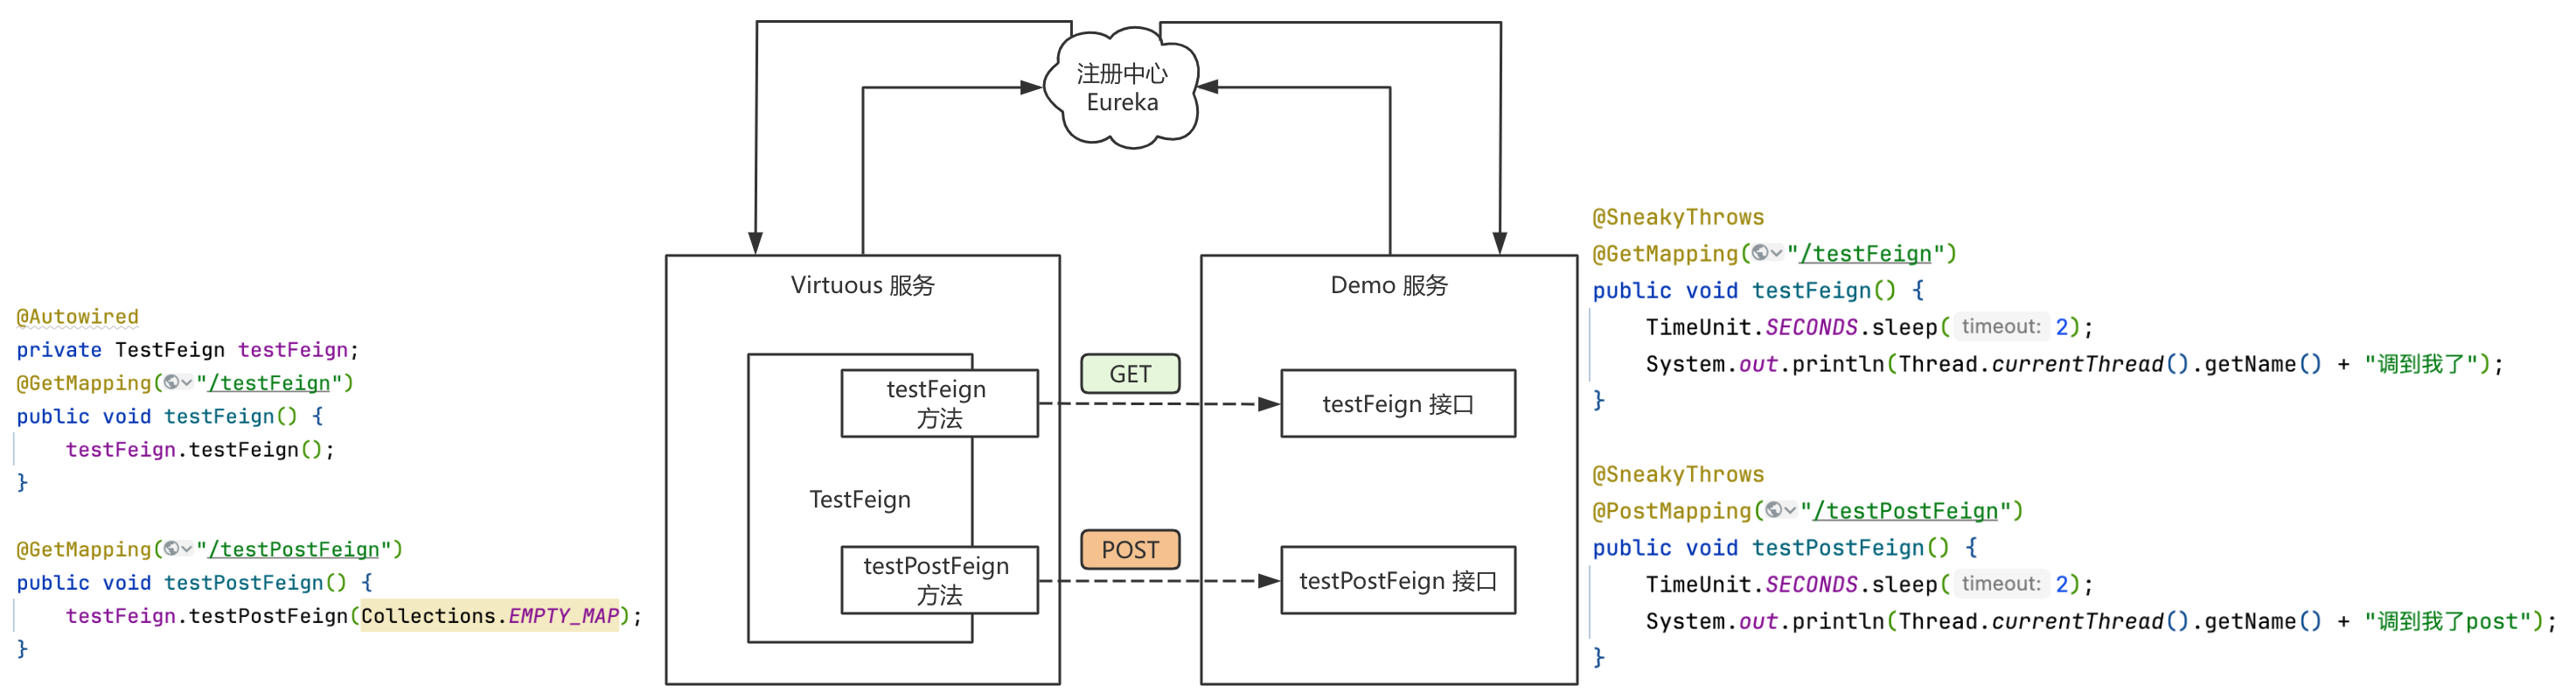
TestFeign 里有两个方法,一个是 GET 请求方式的,一个是 POST 请求方式的:
/*** @author: kuku* @description*/
@FeignClient(value = "demo", path = "/user/", contextId = "testFeign")
public interface TestFeign {@GetMapping(value = "/testFeign", produces = {"application/json"})void testFeign();@PostMapping(value = "/testPostFeign", produces = {"application/json"})void testPostFeign(Map<String, Object> map);
}
我在 Virtuous 服务里配置了响应超时为 1 秒,并且在被调用服务里睡眠了 2 秒,来触发响应超时。
# 响应超时时间
feign.client.config.default.read-timeout=1000
3 问题现象
我们现在可以调用一下 GET 方式的请求:
这是 Virtuous 服务的 feign 请求日志:
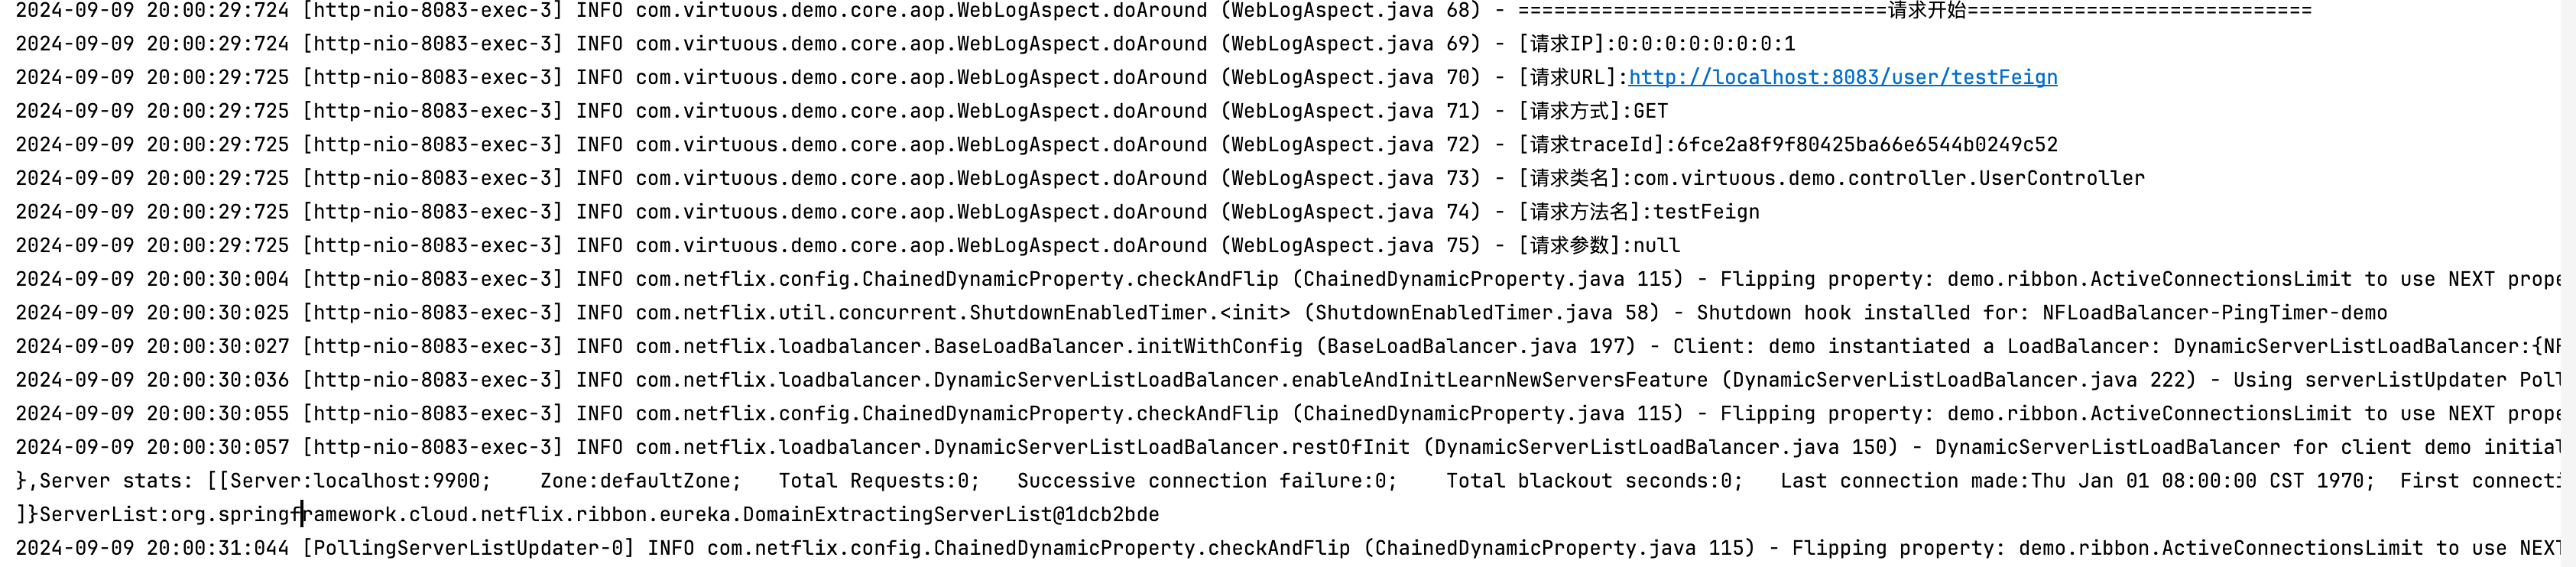
可以看到我们的 Demo 服务被调用了两次:

那我们再试一下 POST 方式的,可以看到 POST 方式的只打印了一次:

至于为什么我这里多放一个 POST 的方式,是因为我分析完源码,发现只有 GET 方式下才会多调用一次,其他请求方式都不会多调用一次,大家也可以换一种别的请求方式试试。
那么接下来我们就从源码的角度看看,为什么没开启重试的情况下,GET 方式怎么会多调用一次呢?
4 源码分析
如果你对 OpenFeign 一点儿不了解的话,可以看看我之前的 【OpenFeign】@FeignClient 注入过程源码分析以及【OpenFeign】@FeignClient 代理对象的创建源码分析。
从哪里看起呢,就从它的执行看起吧,它的 Bean 是由 FeignClientFactoryBean 创建的,最后的落点是在 ReflectiveFeign 的 newInstance 方法中:
@Override
public <T> T newInstance(Target<T> target) {Map<String, MethodHandler> nameToHandler = targetToHandlersByName.apply(target);Map<Method, MethodHandler> methodToHandler = new LinkedHashMap<Method, MethodHandler>();List<DefaultMethodHandler> defaultMethodHandlers = new LinkedList<DefaultMethodHandler>();for (Method method : target.type().getMethods()) {if (method.getDeclaringClass() == Object.class) {continue;} else if (Util.isDefault(method)) {DefaultMethodHandler handler = new DefaultMethodHandler(method);defaultMethodHandlers.add(handler);methodToHandler.put(method, handler);} else {methodToHandler.put(method, nameToHandler.get(Feign.configKey(target.type(), method)));}}/*** InvocationHandlerFactory 工厂* static final class Default implements InvocationHandlerFactory {*   @Override*   public InvocationHandler create(Target target, Map<Method, MethodHandler> dispatch) {*     return new ReflectiveFeign.FeignInvocationHandler(target, dispatch);*   }* }* 可以看到最后返回的增强逻辑是 ReflectiveFeign.FeignInvocationHandler* 这里的 dispatch 是个 map*     key 就是你的 feign 的每个方法 *     value 是方法的处理器  落点类是 SynchronousMethodHandler*/InvocationHandler handler = factory.create(target, methodToHandler);// JDK 代理方式创建T proxy = (T) Proxy.newProxyInstance(target.type().getClassLoader(),new Class<?>[] {target.type()}, handler);...return proxy;
}

那么我们的 Feign 实际执行的时候,是不是就先走 JDK代理的增强逻辑了,是不是就是这里的 ReflectiveFeign.FeignInvocationHandler, 我们进去看看:
// FeignInvocationHandler
static class FeignInvocationHandler implements InvocationHandler {private final Target target;private final Map<Method, MethodHandler> dispatch;FeignInvocationHandler(Target target, Map<Method, MethodHandler> dispatch) {this.target = checkNotNull(target, "target");this.dispatch = checkNotNull(dispatch, "dispatch for %s", target);}@Overridepublic Object invoke(Object proxy, Method method, Object[] args) throws Throwable {// equals hashCode toString 方法略过if ("equals".equals(method.getName())) {try {Object otherHandler =args.length > 0 && args[0] != null ? Proxy.getInvocationHandler(args[0]) : null;return equals(otherHandler);} catch (IllegalArgumentException e) {return false;}} else if ("hashCode".equals(method.getName())) {return hashCode();} else if ("toString".equals(method.getName())) {return toString();}// 获取到当前要执行方法的 MethodHandler(SynchronousMethodHandler) 执行它的 invke 方法return dispatch.get(method).invoke(args);}...
}
接下来我们进入 SynchronousMethodHandler 的 invoke 方法:
// SynchronousMethodHandler
@Override
public Object invoke(Object[] argv) throws Throwable {// 构建请求模版 这是 feign 核心包里的RequestTemplate template = buildTemplateFromArgs.create(argv);Options options = findOptions(argv);// 大家别被这个 retryer 误解,其实它就是 Retryer 接口中的 NEVER_RETRY 也就是不重试 有错就直接抛错Retryer retryer = this.retryer.clone();while (true) {try {// 执行请求return executeAndDecode(template, options);} catch (RetryableException e) {try {// 执行重试器的 continueOrPropagate 方法 // 简单看下不重试的内容其实就是直接抛出异常// Retryer NEVER_RETRY = new Retryer() {//  @Override//  public void continueOrPropagate(RetryableException e) {//    throw e;//  }// }
        retryer.continueOrPropagate(e);} catch (RetryableException th) {Throwable cause = th.getCause();if (propagationPolicy == UNWRAP && cause != null) {throw cause;} else {throw th;}}if (logLevel != Logger.Level.NONE) {logger.logRetry(metadata.configKey(), logLevel);}continue;}}
}
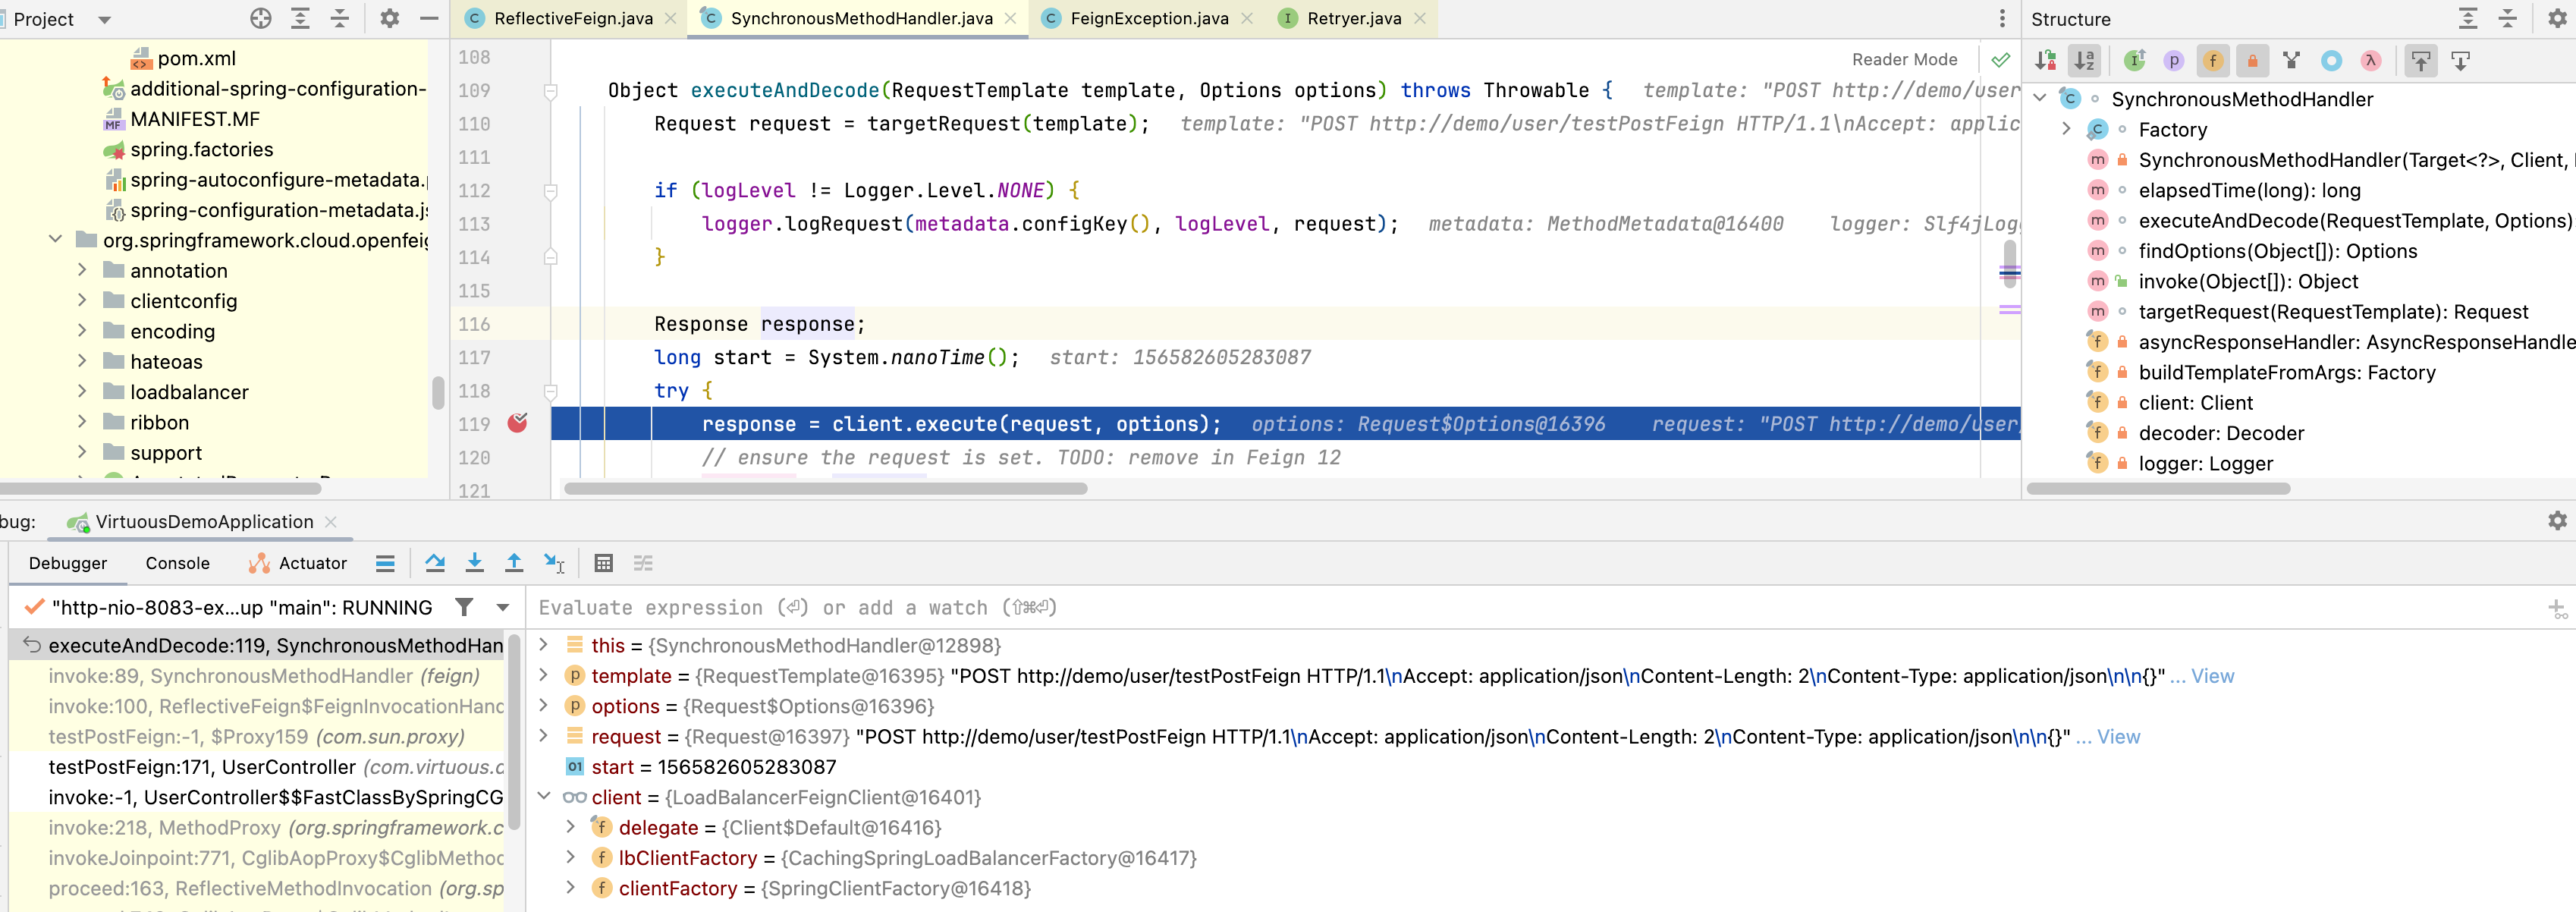
继续看看 executeAndDecode 方法都做了些什么:
// SynchronousMethodHandler
Object executeAndDecode(RequestTemplate template, Options options) throws Throwable {Request request = targetRequest(template);if (logLevel != Logger.Level.NONE) {logger.logRequest(metadata.configKey(), logLevel, request);}response;long start = System.nanoTime();try {// 执行请求response = client.execute(request, options);// ensure the request is set. TODO: remove in Feign 12// 构建 Responseresponse = response.toBuilder().request(request).requestTemplate(template).build();} catch (IOException e) {// 处理 IO 异常 比如响应超时 就会进入到这里if (logLevel != Logger.Level.NONE) {logger.logIOException(metadata.configKey(), logLevel, e, elapsedTime(start));}// 抛出 RetryableException 重试异常 throw errorExecuting(request, e);}// 正常响应 走下边这里 解码并返回结果long elapsedTime = TimeUnit.NANOSECONDS.toMillis(System.nanoTime() - start);if (decoder != null)return decoder.decode(response, metadata.returnType());// ...
  }
}
看到 Client 的 execute 方法,因为我们的 Feign 是设置的服务名称,所以这里的 Client 是负载均衡型的 LoadBalancerFeignClient:
那我们看看它的 execute 方法:
// LoadBalancerFeignClient
@Override
public Response execute(Request request, Request.Options options) throws IOException {try {// URI 处理URI asUri = URI.create(request.url());String clientName = asUri.getHost();URI uriWithoutHost = cleanUrl(request.url(), clientName);FeignLoadBalancer.RibbonRequest ribbonRequest = new FeignLoadBalancer.RibbonRequest(this.delegate, request, uriWithoutHost);IClientConfig requestConfig = getClientConfig(options, clientName);// lbClient方法 返回一个 FeignLoadBalancer 类型对象实际落点是 RetryableFeignLoadBalancer// 它首先会从本地缓存获取服务的实例列表// 不为空就用本地的,为空的话就从注册中心重新获取服务实例// 然后执行请求 executeWithLoadBalancerreturn lbClient(clientName).executeWithLoadBalancer(ribbonRequest, requestConfig).toResponse();}catch (ClientException e) {IOException io = findIOException(e);if (io != null) {throw io;}throw new RuntimeException(e);}
}
那么就到了 RetryableFeignLoadBalancer 的 executeWithLoadBalancer 方法,它是继承了 AbstractLoadBalancerAwareClient,所以这里看他父类的:
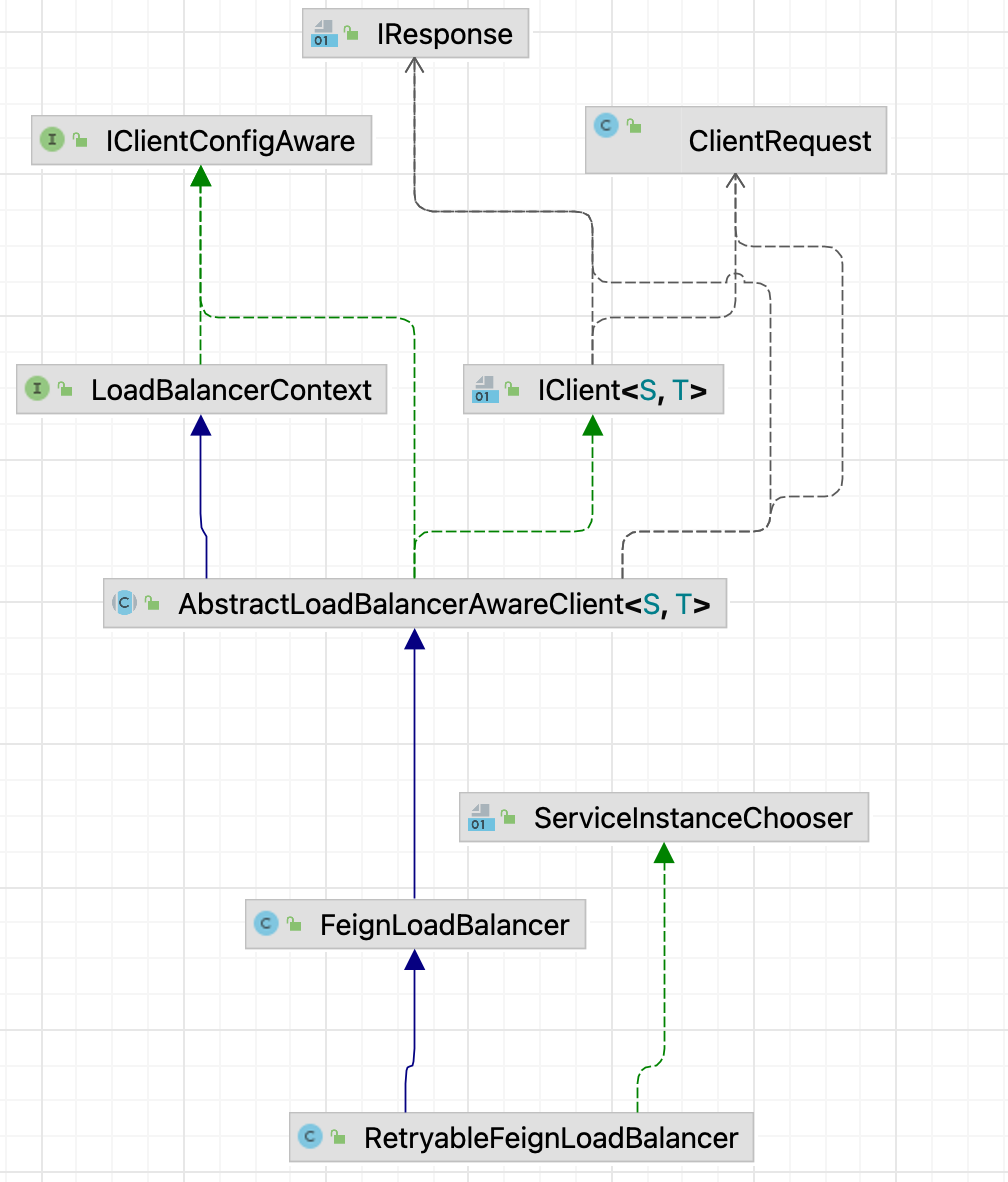
 // AbstractLoadBalancerAwareClientpublic T executeWithLoadBalancer(final S request, final IClientConfig requestConfig) throws ClientException {// 看名称的话 像是命令模式// 说实话这块我没太看懂 我们先看主流程LoadBalancerCommand<T> command = this.buildLoadBalancerCommand(request, requestConfig);try {// 先 submitreturn (IResponse)command.submit(new ServerOperation<T>() {public Observable<T> call(Server server) {URI finalUri = AbstractLoadBalancerAwareClient.this.reconstructURIWithServer(server, request.getUri());S requestForServer = request.replaceUri(finalUri);try {// 最后会执行到这里  外边被套的一层我们可以先忽略return Observable.just(AbstractLoadBalancerAwareClient.this.execute(requestForServer, requestConfig));} catch (Exception var5) {return Observable.error(var5);}}})// 再 blocking
         .toBlocking()// 再执行
         .single();} catch (Exception var6) {Throwable t = var6.getCause();if (t instanceof ClientException) {throw (ClientException)t;} else {throw new ClientException(var6);}}}
AbstractLoadBalancerAwareClient.this.execute(requestForServer, requestConfig) 因为当前是 RetryableFeignLoadBalancer 所以继续执行它的 execute 方法:
 // RetryableFeignLoadBalancer
@Override
public RibbonResponse execute(final RibbonRequest request, IClientConfig configOverride) throws IOException {// ...// 重试策略 // 创建的是 RibbonLoadBalancedRetryPolicy final LoadBalancedRetryPolicy retryPolicy = this.loadBalancedRetryFactory.createRetryPolicy(this.getClientName(), this);RetryTemplate retryTemplate = new RetryTemplate();// ...// 设置重试策略 可以看到用 FeignRetryPolicy 包装了一层 这里标记下 我们下边要用到retryTemplate.setRetryPolicy(retryPolicy == null ? new NeverRetryPolicy() : new FeignRetryPolicy(request.toHttpRequest(), retryPolicy, this, this.getClientName()));// 执行 哎哟 又是两个大 lambda 看的就头疼// 我们这里看的是第一个表达式return retryTemplate.execute(retryContext -> {Request feignRequest = null;// on retries the policy will choose the server and set it in the context// extract the server and update the request being madeif (retryContext instanceof LoadBalancedRetryContext) {ServiceInstance service = ((LoadBalancedRetryContext) retryContext).getServiceInstance();if (service != null) {feignRequest = ((RibbonRequest) request.replaceUri(reconstructURIWithServer(new Server(service.getHost(), service.getPort()),request.getUri()))).toRequest();}}if (feignRequest == null) {feignRequest = request.toRequest();}// 执行请求Response response = request.client().execute(feignRequest, options);if (retryPolicy != null&& retryPolicy.retryableStatusCode(response.status())) {byte[] byteArray = response.body() == null ? new byte[] {}: StreamUtils.copyToByteArray(response.body().asInputStream());response.close();throw new RibbonResponseStatusCodeException(RetryableFeignLoadBalancer.this.clientName, response, byteArray,request.getUri());}// 返回结果return new RibbonResponse(request.getUri(), response);}, new LoadBalancedRecoveryCallback<RibbonResponse, Response>() {@Overrideprotected RibbonResponse createResponse(Response response, URI uri) {return new RibbonResponse(uri, response);}});
}
接下来继续进入 RetryTemplate 的 execute 方法,就到我们本节看的重点了,你们说这想实现一个功能谈何容易啊,进过了多少类多少个方法了都,我们看看:
// RetryTemplate
@Override
public final <T, E extends Throwable> T execute(RetryCallback<T, E> retryCallback, RecoveryCallback<T> recoveryCallback) throws E {return doExecute(retryCallback, recoveryCallback, null);
}
// 接下来就到我们本节的重点了
protected <T, E extends Throwable> T doExecute(RetryCallback<T, E> retryCallback, RecoveryCallback<T> recoveryCallback, RetryState state) throws E, ExhaustedRetryException {RetryPolicy retryPolicy = this.retryPolicy;BackOffPolicy backOffPolicy = this.backOffPolicy;// Allow the retry policy to initialise itself...RetryContext context = open(retryPolicy, state);if (this.logger.isTraceEnabled()) {this.logger.trace("RetryContext retrieved: " + context);}// Make sure the context is available globally for clients who need// it...
    RetrySynchronizationManager.register(context);Throwable lastException = null;boolean exhausted = false;try {// Give clients a chance to enhance the context... 执行监听器 默认是空的boolean running = doOpenInterceptors(retryCallback, context);if (!running) {throw new TerminatedRetryException("Retry terminated abnormally by interceptor before first attempt");}// Get or Start the backoff context...BackOffContext backOffContext = null;Object resource = context.getAttribute("backOffContext");if (resource instanceof BackOffContext) {backOffContext = (BackOffContext) resource;}if (backOffContext == null) {backOffContext = backOffPolicy.start(context);if (backOffContext != null) {context.setAttribute("backOffContext", backOffContext);}}/** We allow the whole loop to be skipped if the policy or context already* forbid the first try. This is used in the case of external retry to allow a* recovery in handleRetryExhausted without the callback processing (which* would throw an exception).*/// !!! 这里就是我们本节要看的重点  canRetrywhile (canRetry(retryPolicy, context) && !context.isExhaustedOnly()) {try {// 发送请求return retryCallback.doWithRetry(context);}catch (Throwable e) {// ...if (canRetry(retryPolicy, context) && !context.isExhaustedOnly()) {try {backOffPolicy.backOff(backOffContext);}catch (BackOffInterruptedException ex) {// ...throw ex;}}// ...
            }if (state != null && context.hasAttribute(GLOBAL_STATE)) {break;}}// ...
    }catch (Throwable e) {throw RetryTemplate.<E>wrapIfNecessary(e);}finally {close(retryPolicy, context, state, lastException == null || exhausted);doCloseInterceptors(retryCallback, context, lastException);RetrySynchronizationManager.clear();}
}
首先第一次进入 canRetry 方法:
// 是否可以重试
protected boolean canRetry(RetryPolicy retryPolicy, RetryContext context) {// 直接调用重试策略 我们刚才看到的重试策略是 用 FeignRetryPolicy 包装了一层的 RibbonLoadBalancedRetryPolicyreturn retryPolicy.canRetry(context);
}
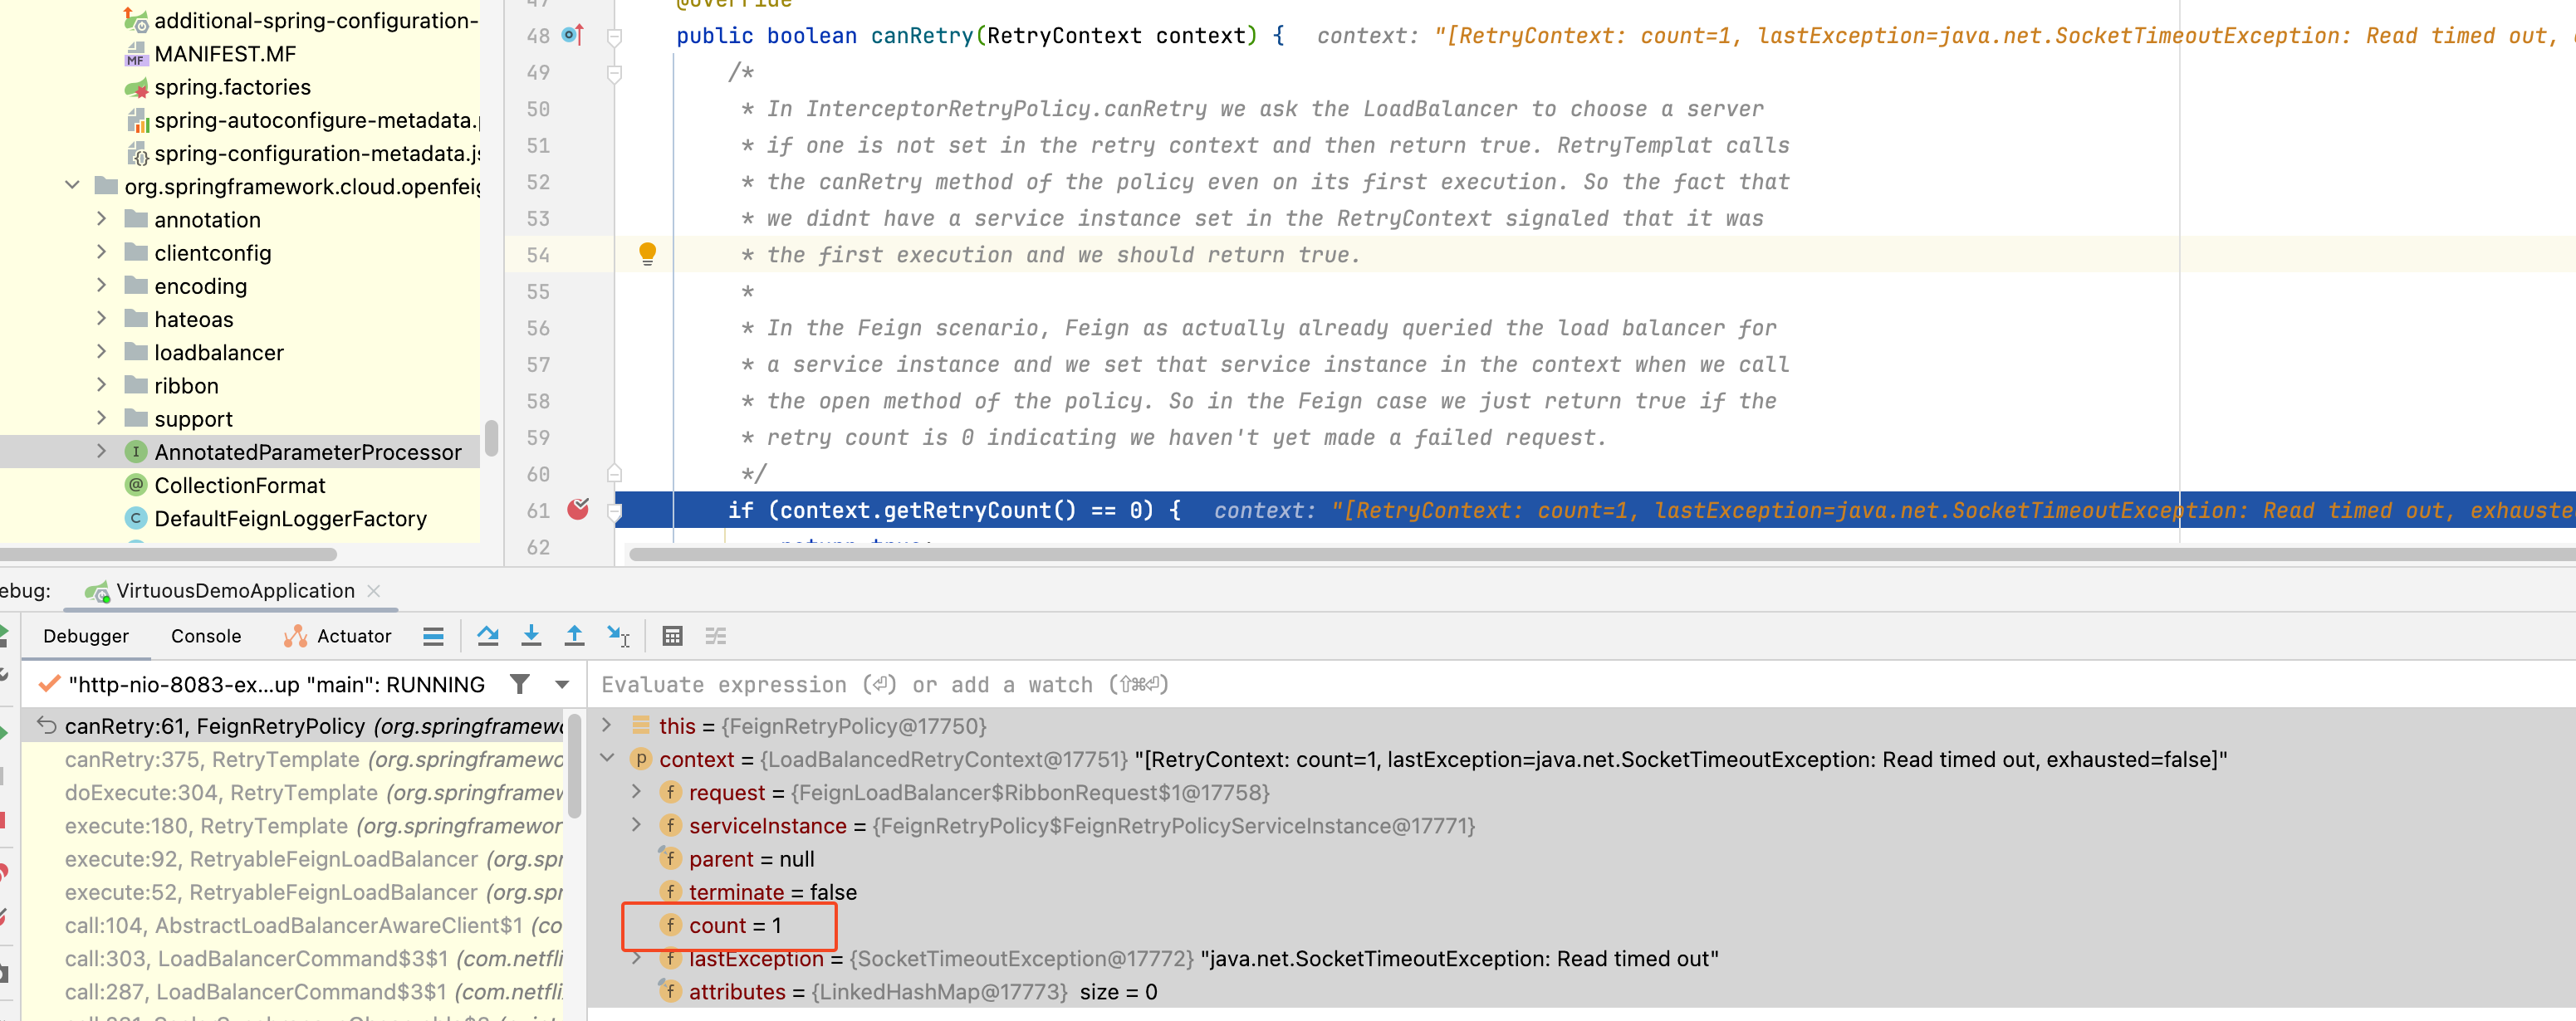
// FeignRetryPolicy
@Override
public boolean canRetry(RetryContext context) {// retryCount 第一次请求为 0 所以第一次判断是否可以的时候 直接返回 trueif (context.getRetryCount() == 0) {return true;}return super.canRetry(context);
}
也就是当第一次发送请求的时候,这时候因为 retryCount == 0 所以直接返回 true ,可以发送第一次请求,当第一次请求失败的情况下,继续进入到 canRetry 方法,这时候 retryCount = 1,
那么再次进来的时候,不满足
// FeignRetryPolicy
@Override
public boolean canRetry(RetryContext context) {// retryCount 第二次请求 count =1 不满足所以执行 super.canRetry 方法if (context.getRetryCount() == 0) {return true;}return super.canRetry(context);
}
那我们看看父类的 canRetry 方法:
// InterceptorRetryPolicy
public class InterceptorRetryPolicy implements RetryPolicy {// public boolean canRetry(RetryContext context) {LoadBalancedRetryContext lbContext = (LoadBalancedRetryContext)context;// 因为 count = 1 所以这里不满足走 elseif (lbContext.getRetryCount() == 0 && lbContext.getServiceInstance() == null) {lbContext.setServiceInstance(this.serviceInstanceChooser.choose(this.serviceName));return true;} else {// this.policy 是谁// 我们上边是不是说了 它是用 FeignRetryPolicy 包装了一层的 RibbonLoadBalancedRetryPolicyreturn this.policy.canRetryNextServer(lbContext);}}
}
// RibbonLoadBalancedRetryPolicy
public boolean canRetryNextServer(LoadBalancedRetryContext context) {// 左边的表达式是满足的 我们直接看右边的 canRetryreturn this.nextServerCount <= this.lbContext.getRetryHandler().getMaxRetriesOnNextServer() && this.canRetry(context);
}

// RibbonLoadBalancedRetryPolicy
public boolean canRetry(LoadBalancedRetryContext context) {HttpMethod method = context.getRequest().getMethod();// 唉 是不是一下豁然开朗了  就是这里了  是 GET 请求 返回 truereturn HttpMethod.GET == method || this.lbContext.isOkToRetryOnAllOperations();
}
哎哟,最后看到这里,算是差不多到头了。
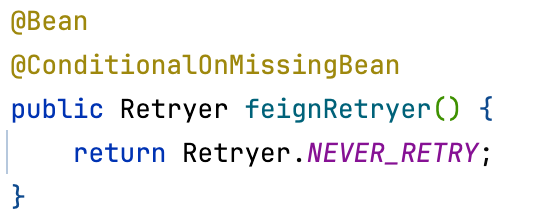
另外插入一个跟本节没关的,当我们没有配置重试的情况下,默认的重试器是 NEVER,可以在 FeignClientsConfiguration 看到,它也是位于 Retryer 接口中的一个默认实现:
5 小结
以前还真没碰到过这种情况,大概知道 GET 请求为什么会多一次请求的原因了,那么为什么要这么设计呢?还请知道的小伙伴指点一下,本节就看到这里哈,下节再看重试器的源码。